Optimizing Protein Homogeneity and Dispersity: A Comprehensive Guide for Reproducible Research and Drug Development
Achieving optimal protein homogeneity and dispersity is a critical, yet often challenging, prerequisite for reproducible research in biochemistry, structural biology, and drug development.
Optimizing Protein Homogeneity and Dispersity: A Comprehensive Guide for Reproducible Research and Drug Development
Abstract
Achieving optimal protein homogeneity and dispersity is a critical, yet often challenging, prerequisite for reproducible research in biochemistry, structural biology, and drug development. This article provides a comprehensive framework for scientists, covering the fundamental importance of sample quality for data integrity and the severe costs of irreproducibility. We explore a suite of methodological approaches, including high-pressure homogenization and enzymatic treatment, to refunctionalize protein aggregates and improve dispersity. A strong emphasis is placed on practical troubleshooting and optimization strategies for challenging samples, followed by a comparative analysis of modern validation techniques like Mass Photometry and SEC-MALS. By integrating foundational knowledge with advanced application and validation protocols, this guide aims to empower researchers to standardize protein quality control, thereby enhancing the reliability and impact of their scientific outcomes.
Why Protein Homogeneity is Non-Negotiable: The Foundation of Reproducible Science
Frequently Asked Questions (FAQs)
Q1: What is the difference between protein purity and protein homogeneity? Protein purity refers to the absence of contaminating proteins or other macromolecules in your sample, typically assessed by techniques like SDS-PAGE. Homogeneity (or dispersity) refers to the structural uniformity and oligomeric state distribution of your protein population—whether the molecules exist as consistent monomers, dimers, or higher-order assemblies without undesirable aggregates. A protein sample can be highly pure (free of contaminants) but heterogeneous in its oligomeric states, which can dramatically affect functional studies and experimental reproducibility [1].
Q2: Why does my purified protein show multiple peaks in size exclusion chromatography? Multiple peaks in SEC indicate a heterogeneous mixture of different molecular sizes in your sample. This could result from:
- Presence of aggregates (high molecular weight)
- Protein degradation or proteolysis (low molecular weight)
- Formation of incorrect oligomeric states
- Instability in the buffer or detergent conditions [2] Troubleshoot by analyzing peak fractions with SDS-PAGE and mass spectrometry to identify the species present, then optimize purification and storage conditions.
Q3: What polydispersity index (PdI) value indicates an acceptably homogeneous sample? A polydispersity index value below 0.3 is generally considered acceptable and indicates a monodisperse, homogeneous system. Values approaching 1.0 indicate a highly heterogeneous mixture of particle sizes [3]. Dynamic light scattering (DLS) instruments provide this measurement, with lower PdI values representing more uniform protein preparations.
Q4: How can I stabilize a purified protein that tends to aggregate? Consider adding small molecule additives to your storage buffer:
- Amino acids (e.g., L-arginine, glycine)
- Sugars (e.g., sucrose)
- Osmolytes (e.g., glycerol) [4] Systematically screen these additives while monitoring homogeneity using size exclusion chromatography or dynamic light scattering.
Q5: My membrane protein aggregates after purification—what should I do? Membrane proteins require specific detergents to remain stable outside their native lipid environment. Implement a systematic detergent screen that tests different:
- Detergent types (varying head groups and alkyl chains)
- Salt concentrations
- pH conditions [2] Monitor results with analytical size exclusion chromatography (ASEC) to identify conditions that maintain mono-dispersity.
Troubleshooting Guides
Problem: Poor Homogeneity After Affinity Chromatography
Symptoms: Multiple peaks in SEC, high PdI in DLS measurements, inconsistent results in functional assays.
Potential Causes and Solutions:
| Cause | Diagnostic Tests | Solution |
|---|---|---|
| Protein aggregation | DLS, SEC-MALS | Add stabilizing additives (e.g., arginine, glycerol) [4], optimize buffer pH/salt [2] |
| Improper oligomeric state | Analytical SEC, Native PAGE | Screen different buffer conditions; consider ion strength effects [2] |
| Proteolytic degradation | SDS-PAGE, Mass spectrometry | Add protease inhibitors during purification; shorten purification time [5] |
| Detergent incompatibility | Analytical SEC, DLS | Perform detergent screen; evaluate mixed micelles [2] |
Protocol: Detergent Screening for Membrane Protein Homogeneity
- Purify membrane protein using standard affinity chromatography
- Prepare 10-15 different detergents at critical micelle concentration (CMC) in compatible buffers
- Exchange detergent by incubating purified protein with each detergent condition
- Analyze each condition using analytical size exclusion chromatography
- Select conditions producing single, symmetric peaks indicating mono-dispersity [2]
Problem: Low Protein Solubility and Recovery
Symptoms: Protein precipitation, low concentration after purification, high light scattering signal.
Potential Causes and Solutions:
| Cause | Diagnostic Tests | Solution |
|---|---|---|
| Low intrinsic solubility | UV spectrophotometry, BCA assay | Add solubility enhancers (e.g., CHAPS, mild denaturants) [4] |
| Incorrect buffer conditions | pH measurement, conductivity | Screen pH (6-8) and salt concentration (50-250 mM) [4] |
| Oxidation or misfolding | Mass spectrometry, activity assays | Add reducing agents; optimize refolding conditions |
| Concentration too high | DLS, visual inspection | Dilute sample; use lower concentration for storage |
Protocol: High-Throughput Solubility Screening
- Prepare protein sample at consistent concentration
- Dispense into 96-well plate containing different buffer additives
- Incubate under standardized conditions (temperature, time)
- Measure solubility using bicinchoninic acid (BCA) assay or UV spectrophotometry [6]
- Confirm homogeneity of best conditions with DLS [3]
Quantitative Data Reference Tables
Acceptable Ranges for Homogeneity Assessment
Table 1: Key metrics for evaluating protein sample homogeneity
| Parameter | Acceptable Range | Ideal Value | Assessment Method |
|---|---|---|---|
| Polydispersity Index (PdI) | < 0.3 | < 0.1 | Dynamic Light Scattering [3] |
| SEC Peak Symmetry | 0.8 - 1.2 | 0.9 - 1.1 | Analytical Size Exclusion Chromatography [2] |
| Mass Accuracy | ± 50 Da | ± 10 Da | Mass Spectrometry [1] |
| Purity Level | > 90% | > 95% | SDS-PAGE/Capillary Electrophoresis [1] |
Small Molecule Additives for Stability Enhancement
Table 2: Common additives to improve protein homogeneity and stability
| Additive | Concentration Range | Mechanism of Action | Considerations |
|---|---|---|---|
| L-Arginine | 50 - 500 mM | Suppresses aggregation; enhances solubility [4] | May affect binding assays |
| Glycerol | 5 - 20% (v/v) | Prevents denaturation; reduces surface adsorption [4] | High viscosity can affect some assays |
| Sucrose | 0.2 - 1.0 M | Excluded volume effect; stabilizes native state [4] | Can increase solution osmolarity |
| Glycine | 50 - 200 mM | Improves solubility; crystallization enhancer [4] | pH-dependent effects |
| Reducing Agents | 1 - 10 mM | Prevents disulfide aggregation | Incompatible with some enzymes |
Experimental Workflows and Methodologies
Basic Protocol: Assessing Protein Homogeneity
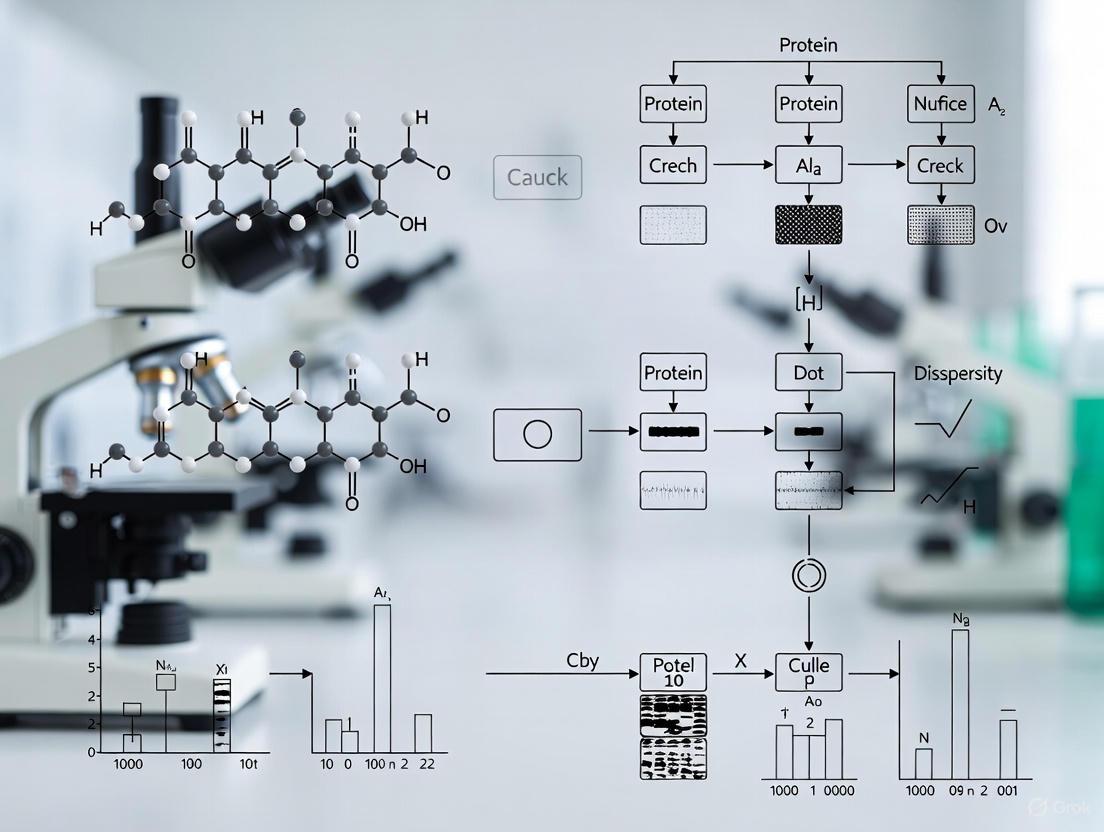
Homogeneity Assessment Workflow
Comprehensive Approach: Systematic Membrane Protein Optimization
Membrane Protein Optimization
The Scientist's Toolkit: Essential Research Reagents
Table 3: Key reagents for optimizing protein homogeneity and dispersity
| Reagent Category | Specific Examples | Function in Homogeneity Optimization |
|---|---|---|
| Detergents | DDM, OG, LDAO, Fos-Choline | Solubilize membrane proteins; maintain native state [2] |
| Chromatography Resins | Ni-NTA, Glutathione, Antibody-conjugated | Affinity purification with specific binding [5] |
| Protease Inhibitors | PMSF, Complete Mini Tablets | Prevent proteolytic degradation during purification [5] |
| Stabilizing Additives | Arginine, glycerol, sucrose | Enhance solubility; prevent aggregation [4] |
| Analysis Standards | Molecular weight markers, SEC standards | Calibrate instruments; validate separation performance |
Implementation Notes:
- Detergent selection is empirical and protein-specific; systematic screening is essential [2]
- Additive effectiveness varies by protein; implement matrix screening approaches
- Quality control should be performed at each purification step, not just the final product [1]
- Document all conditions including buffer composition, temperature, and protein concentration for reproducibility [1]
Troubleshooting Guides and FAQs
Why is my protein yield low after purification?
Low yield can result from protein degradation, inefficient elution, or protein loss during handling.
- Protein Degradation: Perform all purification steps at 4°C and include protease inhibitors during cell lysis to minimize degradation [7].
- Inefficient Elution: For affinity purification, ensure elution conditions are sufficient. If protein doesn't elute, try using more stringent conditions such as increasing NaCl concentration to 2M or decreasing pH. Alternatively, strip the column with 1mM DTT or 10-100mM EDTA [7].
- Handling Loss: Avoid techniques that cause shear stress, such as vigorous pipetting, vortexing, or high-speed centrifugation. Use wide-bore pipette tips and minimize mechanical agitation [8].
How can I reduce protein aggregation in my samples?
Aggregation often stems from improper buffer conditions, oxidation, or stress during purification.
- Buffer Conditions: Optimize pH and salt concentration to keep the protein stable. Sudden pH changes should be avoided. Include additives like glycerol to prevent aggregation [8].
- Prevent Oxidation: To protect sensitive cysteine residues from forming unwanted disulfide bonds, include reducing agents like DTT or β-mercaptoethanol in your buffers. For highly sensitive proteins, consider performing purification steps under an inert atmosphere (e.g., nitrogen or argon) [8].
- Control Hydrolysis: In enzymatic processes, controlled hydrolysis can break down complex protein structures into smaller, more functional fragments and improve solubility [9].
What can I do if my His-tagged protein doesn't bind to the Ni-NTA resin?
Several factors can prevent binding of His-tagged proteins to immobilized metal affinity chromatography (IMAC) resins.
- His-Tag is Inaccessible: If the tag is hidden due to protein folding, try a denaturing elution to expose it [7].
- Stringent Conditions: The presence of imidazole in the binding buffer can interfere. Use a lower concentration (10mM or less). Also, reduce the NaCl concentration from 500mM to 250mM or less [7].
- Resin Integrity: Ensure the resin has not frozen or been stripped by strong chelating agents. Frozen resin that forms clumps is likely non-functional [7].
How can I improve the solubility and dispersity of my purified protein?
Improving solubility is key to achieving homogeneous protein samples.
- Buffer Additives: Add detergents like 0.1% Triton X-100 or Tween-20 to help solubilize proteins. For stubborn proteins, include up to 0.2% Sarkosyl in a guanidine lysis buffer [7].
- Enzymatic Treatment: Using proteases or transglutaminases can strategically modify protein structures. This enzymatic treatment enhances solubility, improves digestibility, and creates a smoother texture (mouthfeel) by breaking proteins into smaller fragments [9].
- Clarify Samples: Before chromatography, always filter and clarify the lysate using centrifugation and 0.45µm or 0.22µm membrane filters to remove debris that can promote aggregation [8].
Table 1: Common Buffer Additives to Enhance Protein Solubility and Stability
| Additive | Typical Concentration | Primary Function | Considerations |
|---|---|---|---|
| Glycerol | 5-20% | Reduces aggregation, stabilizes structure | Alters osmotic pressure; may interfere with assays |
| DTT / β-Mercaptoethanol | 1-20 mM | Prevents oxidation of cysteine residues | Unstable in buffer; prepare fresh |
| CHAPS | 0.1-2% | Detergent; solubilizes membrane proteins | Can interfere with ion exchange chromatography |
| Imidazole | 1-20 mM | Competes for resin binding in His-tag purifications | Use low concentrations in binding/wash steps |
| NaCl | 50-500 mM | Controls stringency; reduces non-specific binding | High concentrations can cause salting out |
| Protease Inhibitors | As recommended | Prevents proteolytic degradation | Cocktails often most effective |
Table 2: Troubleshooting Common Protein Purification Problems
| Problem | Potential Causes | Recommended Solutions | Preventive Measures |
|---|---|---|---|
| Low Yield | Protein degradation, inefficient elution | Use protease inhibitors; optimize elution buffer pH/stringency [7] [8] | Maintain cold chain; include reducing agents |
| Poor Binding | Tag inaccessibility, harsh conditions | Try denaturing conditions; reduce imidazole/NaCl [7] | Check protein sequence; optimize binding buffer |
| Protein Aggregation | Oxidation, buffer mismatch | Add reducing agents, optimize pH/salt [8] | Screen buffer conditions; use stabilizing additives |
| Non-specific Binding | Insufficient washing | Increase wash stringency with NaCl/imidazole [7] | Optimize wash buffers; include mild detergents |
| Low Solubility | Hydrophobic regions exposed | Use chaotropes, detergents, enzymatic treatment [9] [7] | Use solubility enhancers like glycerol |
Experimental Protocols
Protocol: Enzymatic Treatment to Enhance Protein Solubility and Functionality
This protocol uses enzymatic hydrolysis to modify protein isolates, improving their solubility, digestibility, and sensory characteristics for research and development applications [9].
Materials
- Protein Isolate (e.g., Whey, Soy, or Pea Protein Isolate)
- Proteolytic Enzymes (e.g., specific proteases)
- Reaction Buffer (pH and composition suitable for the enzyme)
- Water Bath or incubator for temperature control
- pH Meter
- Equipment to stop reaction (e.g., heat source for inactivation)
Method
- Preparation: Dissolve the protein isolate in the reaction buffer to a desired concentration.
- Hydrolysis: Add the selected proteolytic enzyme to the protein solution. The enzyme-to-substrate ratio should be determined empirically.
- Incubation: Incubate the mixture at the optimal temperature and pH for the enzyme. Continuously monitor and control parameters like temperature, pH, enzyme concentration, and reaction time [9].
- Reaction Termination: After the desired degree of hydrolysis is achieved, inactivate the enzyme (e.g., by heat treatment).
- Recovery: The resulting hydrolysate can be further processed, dried, and analyzed for improved properties.
Key Parameters for Optimization
- Degree of Hydrolysis: Control the reaction time to achieve the optimal balance between improved functionality and potential bitterness.
- Enzyme Specificity: Choose enzymes that target specific peptide bonds to achieve the desired protein profile.
- Reaction Conditions: Maintain precise control over temperature and pH throughout the process to ensure reproducible results.
Protocol: Affinity Purification of His-Tagged Proteins Under Native Conditions
This protocol outlines the steps for purifying soluble, correctly folded His-tagged proteins using Ni-NTA affinity chromatography [7].
Materials
- Ni-NTA Resin
- Lysis Buffer: (e.g., 50 mM NaH₂PO₄, 300 mM NaCl, 10 mM imidazole, pH 8.0)
- Wash Buffer: (e.g., 50 mM NaH₂PO₄, 300 mM NaCl, 20-50 mM imidazole, pH 8.0)
- Elution Buffer: (e.g., 50 mM NaH₂PO₄, 300 mM NaCl, 250-500 mM imidazole, pH 8.0)
- Protease Inhibitor Cocktail
- Lysozyme (optional)
- DNase I (optional)
- Centrifuge and Tubes
- Chromatography Column
Method
- Cell Lysis: Resuspend cell pellet in Lysis Buffer. Lyse cells by sonication, homogenization, or with lysozyme. Include protease inhibitors to prevent degradation. For viscous lysates, add DNase I and incubate on ice.
- Clarification: Centrifuge the lysate at >10,000 x g for 30 minutes at 4°C to remove insoluble debris. Filter the supernatant through a 0.45μm filter.
- Binding: Incub the clarified lysate with pre-equilibrated Ni-NTA resin for 30-60 minutes at 4°C with gentle agitation.
- Washing: Wash the resin with 10-20 column volumes of Wash Buffer. If non-specific binding is high, increase the imidazole concentration or add 0.1% Triton X-100 [7].
- Elution: Elute the bound protein with Elution Buffer. Use a step gradient of imidazole (e.g., 100, 250, 500 mM) or a linear gradient for better separation.
- Analysis: Analyze fractions by SDS-PAGE. Pool fractions containing the target protein and dialyze into an appropriate storage buffer.
Experimental Workflow Visualization
The Scientist's Toolkit: Research Reagent Solutions
Table 3: Essential Reagents for Optimizing Protein Homogeneity
| Reagent / Material | Function | Application Notes |
|---|---|---|
| Ni-NTA Resin | Affinity purification of His-tagged proteins | Avoid freezing; can be stripped and recharged if contaminated [7] |
| Protease Inhibitor Cocktails | Prevent proteolytic degradation during purification | Essential for maintaining protein integrity; use broad-spectrum for unknown proteases [7] [8] |
| Proteolytic Enzymes | Modify protein structure to enhance solubility & functionality | Select based on specificity; control reaction time to achieve desired hydrolysis [9] |
| DTT / β-Mercaptoethanol | Reducing agents to prevent disulfide bond formation | Critical for cysteine-rich proteins; prepare fresh solutions [7] [8] |
| Detergents (Triton X-100, Tween-20) | Reduce non-specific binding, improve solubility | Use at 0.1% in wash buffers; choose based on downstream applications [7] |
| Imidazole | Competitor for His-tag binding sites | Use low concentrations (10-20mM) in binding/wash buffers; higher (250-500mM) for elution [7] |
| Chromatography Columns | Housing for purification resins | Choose appropriate size; avoid exceeding pressure limits (~2.8 psi for Ni-NTA) [7] |
FAQ: Understanding and Preventing Aggregation in Pea Protein
What causes pea protein to aggregate in my experiments? Pea protein aggregation is primarily driven by hydrophobic interactions and disulfide bonding [10]. During processing or experimental treatments like heating or enzymatic hydrolysis, the native structure of the protein is disrupted. This exposes buried hydrophobic amino acid residues, which then interact with each other to form insoluble aggregates [10]. Additionally, cross-linking enzymes such as transglutaminase can catalyze covalent bonds between protein molecules, creating a stable protein network that is difficult to disperse [10].
How can I improve the solubility and dispersibility of a commercial pea protein isolate? Employing sustainable non-thermal processing techniques is an effective strategy. Research indicates that enzymatic treatment significantly enhances solubility, with studies showing improvements from 64.28% to 66.55% [11]. Furthermore, adding small, affordable molecules to your buffer conditions can improve protein stability and homogeneity. Common additives include L-arginine (0.2 - 0.5 M) to increase solubility, and sucrose (0.2 - 1.0 M) or glycerol (5-20%) as stabilizers that help maintain the native protein fold [4].
My sample is viscous and doesn't run well on SDS-PAGE. What should I do? Viscosity is often caused by contaminating genomic DNA [12]. This can be remedied by shearing the DNA through sonication or by passing the lysate through a narrow-gauge needle [12] [13]. Furthermore, ensure your sample is properly denatured. Increasing the boiling time (a common practice is 5 minutes at 98°C) with fresh reducing agents like DTT can help linearize the proteins for better separation [14].
Troubleshooting Guide: Common Scenarios and Solutions
| Problem | Possible Cause | Recommended Solution |
|---|---|---|
| Low Protein Solubility | Hydrophobic aggregation from processing; unsuitable buffer conditions. | Use non-thermal pre-treatments (e.g., ultrasonication); modify buffer with small molecules like L-arginine (0.2-0.5 M) or glycerol (5-20%) [11] [4]. |
| High Sample Viscosity | Contamination by genomic DNA. | Shear genomic DNA via sonication or pass lysate through a 28-gauge needle [12] [13]. |
| Poor Band Separation on SDS-PAGE | Protein overload; improper denaturation; high salt content. | Load less protein (validate optimal amount); ensure fresh DTT and proper boiling (5 min at 98°C); reduce salt concentration via dialysis or desalting columns [12] [14]. |
| Protein Degradation | Activity of endogenous proteases in the lysate. | Perform lysis on ice and include a cocktail of protease inhibitors (e.g., PMSF, Leupeptin, Aprotinin) in the lysis buffer [13]. |
Quantitative Data: Efficacy of Non-Thermal Processing Techniques
The following table summarizes data on non-thermal methods for improving pea protein functionality, as reported in recent scientific literature [11].
| Processing Technique | Key Outcome Metric | Result / Improvement |
|---|---|---|
| Ultrasonication | Protein Content (Yield) | Increased yield from 82.76% to 85.76% [11] |
| Enzymatic Treatment | Protein Digestibility | Enhanced by 20.86% to 22.50% [11] |
| Enzymatic Treatment | Protein Solubility | Improved from 64.28% to 66.55% [11] |
Experimental Protocol: Assessing and Mitigating Aggregation
Protocol 1: Solubility and Homogeneity Check via Dynamic Light Scattering (DLS)
- Objective: To determine the size distribution and polydispersity of pea protein particles in solution, identifying the presence of large aggregates [15].
- Materials: Purified pea protein sample, DLS instrument, appropriate buffer (e.g., Tris or HEPES, pH 6-8).
- Steps:
- Clarify the protein sample by centrifugation at >10,000 x g for 10 minutes.
- Dilute the supernatant to a concentration within the optimal range for your DLS instrument (typically 0.1-1 mg/mL).
- Load the sample into a cuvette and place it in the instrument.
- Measure the hydrodynamic radius and polydispersity index (PDI). A PDI value below 0.2 is generally considered monodisperse.
Protocol 2: Improving Solubility via Enzymatic Modification
- Objective: To hydrolyze pea protein, thereby breaking it into smaller, more soluble peptides and reducing hydrophobic aggregation [11] [10].
- Materials: Commercial pea protein isolate, suitable protease (e.g., Alcalase), buffer, water bath.
- Steps:
- Prepare a dispersion of pea protein (e.g., 2-5% w/v) in a suitable buffer for the enzyme.
- Heat the dispersion to the optimal temperature for the selected protease.
- Add the enzyme at the recommended enzyme-to-substrate ratio.
- Incubate for a predetermined time while stirring.
- Inactivate the enzyme by heating (e.g., 85°C for 5-10 minutes).
- Centrifuge to remove any remaining insoluble aggregates and collect the soluble fraction.
The Scientist's Toolkit: Key Research Reagent Solutions
| Item | Function / Explanation |
|---|---|
| L-Arginine | An amino acid additive that effectively improves protein solubility and stability in solution, often used in concentrations of 0.2-0.5 M [4]. |
| Protease Inhibitors | A cocktail (e.g., PMSF, Leupeptin) added to lysis buffers to prevent protein degradation by endogenous proteases released during cell breakage [13]. |
| DTT (Dithiothreitol) | A reducing agent that breaks disulfide bonds, a key force in protein aggregation. It is used in sample buffers for SDS-PAGE to ensure complete denaturation [14] [13]. |
| CHAPS Detergent | A zwitterionic detergent effective at solubilizing membrane proteins and preventing aggregation of hydrophobic proteins, which can remain insoluble in milder detergents like Triton X-100 [13]. |
Workflow Visualization
This diagram illustrates the decision-making process for diagnosing and resolving common pea protein aggregation issues in a research setting.
Establishing Minimal Quality Control (QC) Standards for Every Protein Reagent
In the realm of biological research and drug development, purified proteins are fundamental reagents. However, inadequate quality of these proteins is a significant contributor to poor data reproducibility, costing the research community billions annually and impeding scientific progress [16]. Establishing and adhering to minimal quality control (QC) standards is not merely a best practice but an essential requirement for generating reliable, reproducible, and interpretable experimental data. This guide provides a foundational framework and practical troubleshooting advice to ensure your protein reagents meet the rigorous standards required for high-quality research.
The Core Minimal QC Standards Framework
A consensus among protein science experts, as outlined by networks like ARBRE-MOBIEU and P4EU, defines three pillars of minimal QC: essential information to document, mandatory quality control tests, and extended characterizations for specific applications [16].
Minimal Information to Document
For any protein reagent used in a study, the following information must be recorded and available:
- Complete Construct Sequence: For recombinant proteins, the full sequence of the expressed construct must be provided, ideally verified by DNA sequencing after cloning [16].
- Detailed Protocols: Expression, purification, and storage conditions should be exhaustively described to enable precise reproduction in any laboratory [16].
- Concentration Measurement: The specific method used for determining protein concentration (e.g., Bradford, BCA, UV absorbance) must be stated [16].
Minimal QC Tests to Perform
These three tests form the non-negotiable core of protein QC, utilizing widely available techniques.
- Purity and Integrity: Assessed by techniques like SDS-PAGE, Capillary Electrophoresis (CE), or Reversed-Phase Liquid Chromatography (RPLC). Mass Spectrometry (MS) is highly recommended for detecting contaminating proteins, proteolysis, and minor truncations [16].
- Homogeneity and Dispersity: This refers to the size distribution and oligomeric state of the protein sample. The presence of incorrect oligomeric states or aggregates can severely skew results like enzyme kinetics. This is best evaluated by Dynamic Light Scattering (DLS), Size Exclusion Chromatography (SEC), or preferably, SEC coupled to multi-angle light scattering (SEC-MALS) [16].
- Molecular Identity: Confirm you have the correct protein using Mass Spectrometry, either through "bottom-up" (mass fingerprinting of tryptic digests) or "top-down" (measuring the intact protein mass) approaches. This verifies the protein's identity and intactness [16].
Extended QC Tests
Depending on the downstream application, further characterization is crucial:
- Folding State: Using methods like circular dichroism.
- Specific Activity: Essential for enzymes.
- Endotoxin Levels: Must be checked for proteins used in cell culture experiments [16].
- Thermostability: Assessed via techniques like Thermofluor (Differential Scanning Fluorimetry) to identify optimal storage and assay conditions [17].
The Scientist's Toolkit: Essential QC Reagents and Materials
Table 1: Key reagents and materials for protein quality control.
| Item | Function in QC |
|---|---|
| SDS-PAGE Gels & Equipment | Separates proteins by molecular weight to assess purity, integrity, and detect proteolysis [18] [19]. |
| Mass Spectrometer | Confirms protein identity, intact mass, and detects post-translational modifications [16] [18]. |
| Dynamic Light Scattering (DLS) Instrument | Measures hydrodynamic radius and assesses sample monodispersity vs. aggregation [18]. |
| Size Exclusion Chromatography (SEC) System | Separates protein species based on size and hydrodynamic volume to evaluate oligomeric state and homogeneity [16]. |
| UV-Vis Spectrophotometer | Measures protein concentration and detects common contaminants like nucleic acids [18]. |
| Affinity Resins & Columns | For initial purification of tagged recombinant proteins [20]. |
| Specific Activity Assay Components | Reagents and substrates needed to measure the functional output of enzymatic proteins. |
| Thermofluor-Compatible Dyes (e.g., SYPRO Orange) | Report on protein thermal unfolding and stability under different buffer conditions [17]. |
Frequently Asked Questions (FAQs) on Protein QC
Q1: My protein is pure according to SDS-PAGE. Why do I need other QC tests? SDS-PAGE is an excellent first check, but it has limitations. It may not detect aggregates (which can remain in the well), minor proteolytic events that change the mass by only a few amino acids, or incorrectly folded protein that has the same molecular weight. DLS and Mass Spectrometry are essential complementary techniques that provide a deeper analysis of homogeneity and molecular identity [16] [18].
Q2: What does a "poly-disperse" DLS result mean, and is it always bad? A poly-disperse result indicates a mixture of particles of different sizes in your sample. This is not inherently bad but requires interpretation. It could signal the presence of undesirable aggregates or simply a defined oligomeric mixture of your protein (e.g., a dimer in equilibrium with a tetramer). While a monodisperse peak is often the goal, the critical question is whether the dispersity affects your protein's function in downstream applications. SEC or SEC-MALS can help further resolve the species present [16].
Q3: How can I quickly improve the stability and homogeneity of my protein?
Use a Thermofluor screen. This method allows you to rapidly test dozens of different buffer conditions (pH, salts, additives) in a 96-well plate format to identify those that maximize your protein's thermal stability (Tm). A higher Tm often correlates with improved homogeneity and better behavior in concentration, crystallization, and activity assays [17].
Troubleshooting Common Protein Purification and QC Issues
Table 2: Common problems and solutions in protein QC.
| Problem | Potential Cause | Troubleshooting Steps |
|---|---|---|
| No protein in final elution | Construct/expression issue. | Verify DNA sequence and that the tag is in-frame. Check expression via SDS-PAGE and western blot with an anti-tag antibody [20]. |
| Low yield or protein concentration | Protein instability or degradation. | Optimize lysis and purification buffers (see Thermofluor, Q3). Add protease inhibitors. Check for and remove degradation-prone regions by construct truncation [17] [19]. |
| High aggregate content | Unstable protein or harsh purification. | Optimize buffer pH and salt concentration. Include stabilizing additives (e.g., sugars, glycerol). Avoid excessive shear forces. Use a gentle elution method [20]. |
| Incorrect molecular weight by MS | Proteolysis or unexpected PTMs. | Check for truncated forms by SDS-PAGE. Use bottom-up MS to map sequence coverage and identify modifications. Verify purification protocol to minimize protease activity [18]. |
| Poor activity despite good purity | Protein misfolding or inactive aggregates. | Check folding state (e.g., by circular dichroism). Use SEC to separate and test activity of different oligomeric states. Ensure reducing environment for proteins with disulfide bonds [16]. |
Workflow Diagram for Protein QC
The following diagram illustrates the logical workflow for implementing a minimal QC standard for any protein reagent.
Integrating these minimal QC standards into your daily research practice is a critical step toward enhancing data reproducibility and reliability. The upfront investment in thorough characterization saves immeasurable time and resources that would otherwise be wasted on interpreting irreproducible results. By adopting this framework, the scientific community can collectively raise the standard of protein-based research, fostering greater confidence in published data and accelerating discovery.
Practical Strategies for Enhancing Dispersity: From Homogenization to Hybrid Systems
High-Pressure Homogenization (HPH) serves as a critical mechanical processing technology in pharmaceutical and biochemical research for optimizing protein homogeneity and dispersity in purified samples. By forcing protein suspensions through a narrow valve under extreme pressures, HPH utilizes a combination of cavitation, shear forces, and turbulence to disrupt insoluble protein aggregates—a common challenge in therapeutic protein development. This technology directly addresses the industry-wide need for efficient particle size reduction and structural modification of plant-based and recombinant proteins, ultimately enhancing their functional properties for drug formulations and delivery systems. The controlled application of HPH enables researchers to achieve reproducible results in sample preparation, significantly improving batch-to-batch consistency in protein-based therapeutic development.
Technical Mechanisms: How HPH Disrupts Protein Aggregates
Fundamental Disruption Forces
The aggregate disruption capability of HPH stems from intense mechanical forces generated as protein suspensions pass through the homogenizer's microscopic gap:
- Shear Stress: Laminar and turbulent flow profiles create strong velocity gradients that mechanically tear apart aggregate structures [21].
- Cavitation: Rapid pressure changes cause vapor bubble formation and implosion, generating shockwaves that fracture aggregate particles [22].
- Impact and Collision: High-velocity particles collide with each other and with homogenizer surfaces, causing further size reduction [22].
- Turbulence: Intense eddy currents in the fluid create chaotic flow patterns that exert twisting and tearing forces on aggregates [22].
The following diagram illustrates the sequential mechanisms of protein aggregate disruption as material passes through an HPH valve:
Structural Modifications in Proteins
HPH induces specific structural changes to protein molecules that enhance dispersity:
- Quaternary Structure Disassembly: HPH disrupts non-covalent bonds holding multi-subunit complexes together, effectively dissociating legumin hexamers and vicilin trimers in plant proteins [21].
- Tertiary Structure Unfolding: Mechanical forces partially unfold compact globular structures, exposing hydrophobic regions and functional groups [23].
- Aggregate Fragmentation: Large insoluble aggregates break into smaller, more uniform particles with increased surface area [10].
- Secondary Structure Modifications: Circular dichroism studies demonstrate alterations in α-helix and β-sheet content, affecting protein solubility and functionality [21].
Table 1: HPH-Induced Structural Changes and Functional Outcomes in Plant Proteins
| Protein Type | Structural Modification | Functional Outcome | Research Citation |
|---|---|---|---|
| Pea Protein | Decreased vicilin-to-legumin ratio; partial unfolding | Increased solubility from 18% to 42%; improved emulsion stability | [21] |
| Hazelnut Protein | Reduced particle size; secondary structure changes | Enhanced gel hardness (1.52g to 2.06g); improved water holding capacity | [23] |
| Soy Protein | Disruption of insoluble aggregates; increased surface hydrophobicity | Improved gel formation; higher storage modulus (291Pa to 528Pa) | [23] |
| Lentil Protein | Structural unfolding; increased free sulfhydryl groups | Enhanced solubility, foaming and emulsifying capacity | [21] |
Troubleshooting Guide: Common HPH Experimental Challenges
Pressure and Flow-Related Issues
Problem: Inability to reach or maintain target homogenization pressure during protein processing.
Potential Causes and Solutions:
- Homogenizing Valve Leakage: Worn valve seats or O-rings cause pressure loss and noisy operation. Inspect homogenizing head and seat for damage; replace worn O-rings and anti-extrusion rings [24] [25].
- Suction/Discharge Valve Malfunction: Broken springs, damaged balls, or worn valve seats prevent proper pumping action. Remove front covers to inspect valve components; replace broken springs and damaged valves [26].
- Plunger Seal Leakage: Worn plunger seals allow fluid bypass, reducing pressure generation. Check for leakage at plunger seals; replace if worn or damaged [25].
- Cavitation: Air entrapment in protein suspension creates vapor bubbles that disrupt flow. Degas protein solutions before processing; ensure proper feed pressure and check for suction line leaks [26].
Material Flow and Quality Issues
Problem: Reduced flow rate or inconsistent homogenization results with protein samples.
Potential Causes and Solutions:
- Main Motor Belt Slippage: Worn or loose belts reduce plunger speed and flow rate. Inspect drive belts for wear and proper tension; replace if necessary [24] [25].
- Partially Blocked Valves: Protein aggregates or crystals obstruct valve operation. Disassemble and clean valves; pre-filter concentrated protein solutions if needed [26].
- Incorrect Protein Concentration: Excessive viscosity hinders proper flow through the homogenizer. Optimize protein concentration (typically 1-10% w/v) for your specific sample [21] [23].
- Temperature Fluctuations: Protein viscosity changes with temperature, affecting flow characteristics. Use heat exchangers to maintain constant temperature (often 20-30°C) during processing [21].
Equipment Performance and Maintenance Issues
Problem: Unusual noises, motor overload, or gradual performance degradation.
Potential Causes and Solutions:
- Main Motor Overload: Excessive homogenization pressure or mechanical resistance strains the motor. Verify pressure settings are within manufacturer recommendations; check for worn power transmission components [24] [25].
- Worn Bearings or Connecting Rods: Mechanical damage causes unusual knocking noises. Inspect bearings, connecting rod nuts/bolts, and bushings for wear; replace damaged components [24].
- Pressure Gauge Malfunction: Faulty gauges provide inaccurate pressure readings. Check if pointer returns to zero after pressure release; replace if defective [24].
- General Wear and Tear: Regular operation with abrasive samples (e.g., calcium-fortified proteins) accelerates component wear. Implement preventive maintenance schedule; replace wear parts based on manufacturer recommendations [22] [25].
Table 2: Troubleshooting Guide for Common HPH Problems in Protein Processing
| Problem | Possible Causes | Immediate Actions | Preventive Measures |
|---|---|---|---|
| Pressure instability | Cavitation, air in product, worn valves | Degas sample, check suction lines, inspect valves | Regular valve inspection, proper sample preparation |
| Reduced flow rate | Worn plunger seals, blocked valves, motor issues | Inspect seals and valves, check motor speed | Regular seal replacement, sample pre-filtration |
| Abnormal noise | Worn bearings, loose components, cavitation | Identify noise source, check bearings and connectors | Routine lubrication, proper equipment operation |
| Product temperature increase | Insufficient cooling, high pressure, frequent passes | Verify heat exchanger function, optimize pressure | Maintain cooling systems, limit recycle passes |
| Inconsistent results | Worn homogenizing valve, pressure fluctuations | Inspect homogenizing valve, verify pressure settings | Regular valve maintenance, pressure calibration |
Frequently Asked Questions (FAQs)
HPH Application and Optimization
Q1: What HPH pressure levels are most effective for different protein types?
- Plant proteins (pea, lentil): 60-100 MPa for 1-5 cycles significantly improves solubility and functionality [21].
- Nut proteins (hazelnut, almond): 100-150 MPa effectively reduces particle size and enhances gelation properties [23].
- General protein aggregate disruption: Start with 50-80 MPa and increase incrementally based on particle size analysis.
Q2: How does HPH compare to other protein disruption methods? HPH provides mechanical, non-thermal processing that avoids chemical modification. Compared to ultrasonication, HPH typically achieves more uniform particle size reduction. Unlike enzymatic treatment, HPH doesn't introduce foreign substances but may cause more extensive structural unfolding than mild enzymatic approaches [10].
Q3: What is the optimal number of passes for protein homogenization? Most studies utilize 1-5 passes, with diminishing returns beyond this range. For pea proteins, 5 cycles at 60 MPa significantly modified protein structure while minimizing excessive denaturation. Always validate passes for your specific protein through solubility and activity assays [21].
Technical Specifications and Limitations
Q4: What protein concentrations can be effectively processed with HPH? Typical working concentrations range from 1-10% (w/v). For research-scale protein isolation, 1% solutions are common [21]. Higher concentrations may require optimization of pressure and cycle number to avoid clogging and ensure efficient homogenization.
Q5: How does HPH affect protein stability and denaturation? HPH can cause partial denaturation through mechanical unfolding, which often enhances functional properties like solubility and emulsification. However, excessive pressure (>150 MPa) or cycles may cause undesirable aggregation. Always monitor thermal stability via DSC and structural changes via circular dichroism [21].
Q6: Can HPH process sensitive therapeutic proteins? Yes, with parameter optimization. The absence of heat and chemicals makes HPH suitable for sensitive proteins. Start with lower pressures (20-50 MPa) and minimal cycles, then gradually increase while monitoring biological activity retention.
Experimental Protocols and Methodologies
Standard HPH Protocol for Plant Protein Modification
This methodology is adapted from published research on pea and hazelnut protein modification [21] [23]:
Materials and Reagents:
- Protein isolate (commercial or extracted via alkaline extraction/acid precipitation)
- Appropriate buffer (e.g., phosphate buffer saline, pH 7.0-7.5)
- High-pressure homogenizer with temperature control
- Ice bath for sample collection
- Analytical equipment (SDS-PAGE, dynamic light scattering, spectrophotometer)
Step-by-Step Procedure:
Sample Preparation:
- Prepare protein solution at 1% (w/v) concentration in appropriate buffer
- Stir for 2 hours at room temperature to ensure complete hydration
- Adjust pH to desired value (typically 7.0 for most applications)
- Pre-filter through coarse filter if large aggregates are visible
HPH Processing:
- Set homogenizer temperature control to maintain 20-30°C during processing
- Prime system with buffer to establish stable flow
- Load protein sample into feed reservoir
- Process through homogenizer at selected pressure (60-150 MPa)
- Subject to predetermined number of passes (typically 3-5 cycles)
- Collect samples after each pass for analysis if studying progressive effects
Post-Processing:
- Immediately cool processed samples on ice
- Analyze for particle size, solubility, and structural changes
- Store at appropriate conditions for further experimentation
Validation Measurements:
- Solubility: Centrifuge at 10,000 × g for 10 min; measure protein in supernatant
- Particle Size: Dynamic light scattering to determine size distribution
- Structural Analysis: SDS-PAGE under reducing and non-reducing conditions
- Functional Properties: Emulsifying capacity, water/oil holding capacity as required
Research Reagent Solutions for HPH Protein Studies
Table 3: Essential Materials and Reagents for HPH Protein Research
| Reagent/Equipment | Specifications | Research Function | Example Application |
|---|---|---|---|
| Protein Isolates | Pea, hazelnut, soy; 85-90% purity | Primary substrate for HPH modification | Structural functionality studies [21] [23] |
| Buffer Systems | Phosphate buffer (50 mM, pH 6.5-7.5) | Maintain pH during processing | Stability and solubility measurements [21] |
| Glucono-δ-lactone (GDL) | Food-grade acidulant | Induce acid-induced gelation | Cold-set gel formation studies [23] |
| SDS-PAGE Reagents | Precast gels, Coomassie Blue | Analyze protein composition and degradation | Monitor HPH-induced structural changes [21] |
| Dynamic Light Scattering | Particle size analyzer | Measure aggregate size distribution | Quantify HPH disruption efficiency |
Enzymatic Hydrolysis for Improved Solubility and Digestibility
Troubleshooting Common Experimental Challenges
FAQ: My protein hydrolysate has an unacceptably bitter taste. What is the cause and how can I mitigate this?
- Cause: Bitterness is often caused by the formation of short-chain peptides with hydrophobic amino acids during hydrolysis [9].
- Solution: You can manage this by:
- Controlling the Degree of Hydrolysis (DH): Avoid over-hydrolysis, as extensive breakdown increases bitter peptide formation [9].
- Enzyme Selection: Use specific proteases like pepsin, which is known to produce hydrolysates with a low bitter taste [27].
- Post-Hydrolysis Treatment: Apply purification techniques such as ultrafiltration to remove small, bitter peptides [28].
FAQ: The solubility of my protein sample has not improved after enzymatic hydrolysis. What might have gone wrong?
- Potential Causes and Solutions:
- Incorrect Enzyme Selection: Different enzymes cleave proteins at different sites. Alkaline protease, for example, has been shown to significantly enhance solubility in mung bean protein isolates [29]. Ensure the enzyme you select is appropriate for your specific protein source.
- Suboptimal Reaction Conditions: Parameters like pH, temperature, and enzyme-to-substrate ratio (E/S) are critical. For instance, a study on yak whey protein found optimal hydrolysis with alkaline protease at pH 8.0 and 62°C [28]. Use experimental design methodologies like Response Surface Methodology (RSM) to optimize these conditions for your protein.
- Inadequate Purity of Starting Material: Contaminants in your initial protein isolate can interfere with the hydrolysis reaction. Ensure your protein sample meets minimal quality control standards, including checks for purity and identity, before beginning hydrolysis [16].
FAQ: How can I ensure my purified protein or hydrolysate is of high quality and suitable for my research?
- Guidance: Implement the following minimal quality control (QC) tests as a standard practice [16]:
- Purity Analysis: Use SDS-PAGE, Capillary Electrophoresis (CE), or Reversed-Phase Liquid Chromatography (RPLC) to detect contaminating proteins or sample proteolysis.
- Homogeneity/Dispersity Assessment: Analyze the oligomeric state and check for aggregates using Dynamic Light Scattering (DLS) or Size Exclusion Chromatography (SEC). This is crucial for accurate concentration measurement and reproducible results in downstream experiments like enzyme kinetics.
- Identity Confirmation: Confirm the protein's identity and intactness using mass spectrometry (MS), either through mass fingerprinting of tryptic digests or by measuring the intact protein mass.
Summarized Experimental Data
The following tables consolidate key quantitative data from recent studies to guide your experimental planning.
Table 1: Optimal Hydrolysis Conditions for Different Protein Sources
| Protein Source | Optimal Enzyme | Optimal pH | Optimal Temperature (°C) | E/S Ratio | Hydrolysis Time (Hours) | Key Outcome | Citation |
|---|---|---|---|---|---|---|---|
| Soy Protein Isolate | Pepsin | 1.5-3.5 (Acidic) | Not Specified | 1.5% (w/w) | 4 | High protein recovery (89.70%) and bioactive peptides [27]. | |
| Yak Whey Protein Concentrate | Alkaline Protease | 8.0 | 62 | 7500 U/g | 2.5 | Highest peptide concentration (17.21 mg/mL) [28]. | |
| Mung Bean Protein Isolate | Alcalase | 8.5 | 55 | 5.88% (v/w) | 3.56 | ~33% Degree of Hydrolysis; improved solubility & bioactivity [29]. |
Table 2: Bioactivity of Ultrafiltration Fractions from Yak Whey Protein Hydrolysate
| Ultrafiltration Fraction(Molecular Weight) | α-amylase Inhibition(%) | XOD Inhibition(%) | ABTS Radical Scavenging(%) | Citation |
|---|---|---|---|---|
| <1 kDa | 22.06 | 17.15 | 69.55 | [28] |
| 1-3 kDa | Data not provided in source | Data not provided in source | Data not provided in source | |
| 3-5 kDa | Data not provided in source | Data not provided in source | Data not provided in source | |
| 5-10 kDa | Data not provided in source | Data not provided in source | Data not provided in source | |
| >10 kDa | Data not provided in source | Data not provided in source | Data not provided in source |
Detailed Experimental Protocol: Enzymatic Hydrolysis of Protein Isolates
This protocol provides a generalized workflow for the enzymatic hydrolysis of protein isolates, which can be adapted based on the specific optimization data in Table 1.
1. Preparation of Experimental Materials and Reagents [30]
- Protein Sample: Use a purified protein isolate (e.g., Soy Protein Isolate, Mung Bean Protein Isolate). Ensure the sample is completely dissolved in an appropriate buffer. Determine protein concentration using a standard assay (e.g., Bradford assay).
- Protease: Select a suitable protease (e.g., Alkaline protease, Pepsin, Alcalase) and prepare an enzyme solution of known activity.
- Buffer Solution: Choose a buffer that maintains the optimal pH for the selected enzyme (e.g., Phosphate buffer for alkaline conditions).
- Other Reagents: Have acids (e.g., HCl) and bases (e.g., NaOH) on hand for pH adjustment during the reaction. Prepare reagents for reaction termination (e.g., another acid/base for pH shift, or a heating block for thermal inactivation).
2. Hydrolysis Reaction [27] [28] [29]
- Reaction Setup: In a reaction vessel, combine the protein solution with buffer to achieve a typical substrate concentration of 3-5% (w/v).
- Condition Equilibrium: Place the vessel in a temperature-controlled water bath or heating block and allow it to equilibrate to the optimal temperature for your enzyme (see Table 1).
- Initiation: Adjust the pH to the enzyme's optimum and then add the predetermined amount of enzyme (E/S ratio from Table 1) to start the hydrolysis. Gently stir the mixture throughout the reaction.
- Control and Monitoring: Maintain the pH stat by adding acid/base as needed. The reaction should proceed for the optimized time (see Table 1). You can periodically withdraw samples to monitor the Degree of Hydrolysis (DH).
3. Reaction Termination and Product Recovery [30] [29]
- Termination: After the desired time, terminate the reaction by rapidly inactivating the enzyme. This is typically done by:
- Separation: Cool the hydrolysate and centrifuge it (e.g., at 10,000× g for 20 minutes at 4°C) to remove any insoluble aggregates or denatured enzyme [29].
- Purification and Analysis: The supernatant contains your protein hydrolysate. It can be further fractionated by ultrafiltration [28] and then lyophilized for storage. Always perform QC checks on the final product [16].
Process and Quality Control Visualization
Enzymatic Hydrolysis Workflow
Protein QC for Research Reproducibility
The Scientist's Toolkit: Research Reagent Solutions
Table 3: Essential Reagents for Enzymatic Hydrolysis and QC
| Reagent / Material | Function / Application | Key Considerations |
|---|---|---|
| Proteases (e.g., Alkaline Protease, Pepsin, Alcalase, Trypsin) | Catalyze the cleavage of peptide bonds to hydrolyze proteins into smaller peptides [9] [27] [28]. | Select based on specificity, optimal pH (e.g., pepsin for acidic conditions), and the desired bioactivity of the resulting hydrolysate [27] [30]. |
| Ultrafiltration Membranes | Fractionate hydrolysates by molecular weight to isolate specific peptide sizes, remove bitter compounds, or concentrate samples [28]. | Choose membranes with appropriate molecular weight cut-offs (e.g., 1kDa, 3kDa, 10kDa) to target specific bioactive peptide fractions [28]. |
| Buffers (e.g., Tris, Phosphate, HEPES) | Maintain stable pH during hydrolysis and purification, which is critical for enzyme activity and protein stability [31]. | Tris is the most commonly used buffer in protein purification (49.2% of cases). Ensure compatibility with your enzyme's optimal pH range [31]. |
| Affinity Tags (e.g., Polyhistidine-tag) | Facilitate purification of recombinant proteins via immobilized metal affinity chromatography (IMAC) [31]. | The polyhistidine-tag is dominant (82.5% of cases). It enhances expression, solubility, and enables high-purity isolation [31]. |
| QC Instruments: SDS-PAGE, DLS, Mass Spectrometry | Assess protein purity, homogeneity/dispersity, and identity as minimal QC standards to ensure research reproducibility [16]. | These are essential for verifying that the protein/hydrolysate is correct, intact, and free of aggregates or contaminants before use in downstream applications [16]. |
Creating Hetero-Protein Systems for Functional Complementation
Within the scope of optimizing protein homogeneity and dispersity in purified samples, the creation of hetero-protein systems presents unique challenges. Functional complementation assays rely on the precise interaction of multiple, distinct protein subunits. The success and reproducibility of these experiments are fundamentally dependent on the quality of the individual protein components. Sample heterogeneity, such as the presence of aggregates, misfolded species, or unintended proteolytic fragments, can severely compromise functional data, leading to inaccurate conclusions about protein-protein interactions and complementation efficacy [16]. This technical support center is designed to guide researchers through common pitfalls, providing actionable troubleshooting advice to ensure the production of high-quality, homogeneous protein samples for reliable research outcomes.
Troubleshooting Guides and FAQs
Frequently Asked Questions
Q1: My hetero-protein system shows no functional activity after purification. What are the primary causes I should investigate?
A1: A lack of activity can stem from several issues related to protein quality. First, confirm the identity and integrity of each protein in your system using mass spectrometry (e.g., intact protein mass measurement) to ensure the correct sequence and detect any proteolysis or major truncations [16]. Second, assess sample homogeneity and oligomeric state via size-exclusion chromatography (SEC) or dynamic light scattering (DLS). Aggregates or an incorrect oligomeric state can directly prevent functional complementation [16]. Third, verify that essential cofactors have not been removed during purification, and consider adding them back to the assay buffer [32].
Q2: I observe excessive protein degradation in my samples. How can I mitigate this?
A2: Protein degradation, a common issue that destroys homogeneity, can be minimized by:
- Performing all purification steps at 4°C and using pre-chilled buffers [7].
- Including protease inhibitors in all cell lysis and initial purification buffers [7].
- For recombinant proteins, ensuring the affinity tag is not being cleaved during processing. If degradation persists, check the construct design and consider using an N-terminal versus C-terminal tag or vice versa [7].
Q3: My His-tagged protein is not binding to the Ni-NTA resin. What could be wrong?
A3: This binding failure can occur for several reasons:
- The affinity tag is not accessible. If the His-tag is hidden due to protein folding, you may need to switch to denaturing purification conditions to expose the tag [7].
- Construct issues. Verify by DNA sequencing that there were no cloning errors and that the protein-coding region is in-frame with the tag [33].
- Low expression. Check the expression level of your construct via SDS-PAGE and Western blot analysis using an antibody against the affinity tag [33].
Troubleshooting Common Experimental Issues
The table below summarizes common problems, their potential causes, and solutions specifically for purifying components of hetero-protein systems.
Table 1: Troubleshooting Purification of Tagged Proteins for Hetero-Systems
| Problem | Potential Causes | Recommended Solutions |
|---|---|---|
| No protein in eluate | Protein not expressing; tag inaccessible; protein degraded [7] [33] [32] | Sequence DNA construct; check expression via Western blot; use denaturing conditions; add protease inhibitors; ensure elution buffer is fresh and correctly prepared [7] [33]. |
| Low binding to affinity resin | Tag not accessible; binding conditions too stringent; resin compromised [7] [33] | Reduce flow rate or incubate sample with resin; reduce imidazole (1-5 mM) and/or NaCl (e.g., to 250 mM) in binding/wash buffer; if resin froze and formed clumps, replace it [7] [33]. |
| Contaminants co-elute with target | Wash conditions not stringent enough; non-specific binding [7] [33] [32] | Increase stringency of washes (e.g., increase [NaCl] to 2M, increase [imidazole]); add a mild non-ionic detergent (e.g., 0.1% Triton X-100) to wash buffer; perform a second purification step [7]. |
| Protein precipitation/aggregation | Buffer conditions cause instability; shear stress [34] [32] | Optimize buffer pH and salt concentration; add stabilizing agents (e.g., glycerol); avoid vortexing and use wide-bore pipette tips to minimize shear stress; purify at room temperature if protein is stable [34]. |
| Low final protein yield | Protein not recovered in soluble fraction; expression level low; protein degradation [7] [35] | Solubilize protein complexes with mild, non-ionic detergents; optimize induction conditions (IPTG concentration, temperature, time); include protease inhibitors during lysis [7]. |
Experimental Protocols for Enhanced Homogeneity
Protocol: Size-Exclusion Chromatography (SEC) for Assessing Homogeneity
This protocol is critical for evaluating the oligomeric state and dispersity of your purified protein samples, a key metric for functional studies [16].
1. Principle: SEC separates proteins based on their hydrodynamic radius, allowing the resolution of monomers, defined oligomers, and aggregates from each other.
2. Reagents and Buffers:
- SEC Running Buffer: 20 mM HEPES, 150 mM NaCl, pH 7.5. Filter through a 0.22 µm membrane and degas before use.
- SEC Standards: A kit of proteins of known molecular weight for column calibration.
3. Procedure: 1. Equilibrate the SEC column with at least 2 column volumes (CV) of running buffer at a constant flow rate recommended for the column. 2. Clarify your protein sample by centrifugation at high speed (e.g., 14,000 x g for 10 minutes) to remove any insoluble material. 3. Concentrate the protein sample to a volume suitable for injection (typically 0.5-2% of the column CV). 4. Inject the sample onto the column and elute isocratically with running buffer, monitoring the UV absorbance (e.g., at 280 nm). 5. Collect fractions corresponding to distinct peaks.
4. Analysis:
- Analyze the chromatogram. A single, symmetric peak suggests a homogeneous preparation. Multiple peaks or broad, asymmetric peaks indicate heterogeneity (e.g., mixtures of oligomers or aggregates) [16].
- Analyze the fractions by SDS-PAGE to confirm the identity of the protein in each peak.
SEC Workflow for Homogeneity Assessment
Protocol: Quality Control for Recombinant Protein Identity and Purity
This protocol outlines the minimal QC tests recommended to ensure the quality of protein reagents, thereby improving research data reproducibility [16].
1. Purity Analysis by SDS-PAGE:
- Run an aliquot of the purified protein on a precast SDS-PAGE gel under reducing conditions.
- Stain the gel with Coomassie Blue or a more sensitive stain.
- A pure protein preparation should show a single major band at the expected molecular weight. Additional bands indicate contaminating proteins or proteolytic fragments.
2. Identity Confirmation by Mass Spectrometry (MS):
- Intact Protein MS: Determine the mass of the intact protein. This confirms the identity of the protein and detects whether it has suffered any proteolysis or post-translational modifications (micro-heterogeneity) [16].
- Tryptic Digest MS (Mass Fingerprinting): Digest the protein with trypsin and analyze the peptides by MS. This confirms the protein's identity and is especially useful if a host protein of similar mass was purified in error [16].
Table 2: Minimal Quality Control Tests for Protein Reagents [16]
| QC Test | Technique Examples | Key Information Provided |
|---|---|---|
| Purity | SDS-PAGE, Capillary Electrophoresis, Reversed-Phase LC | Presence of contaminating proteins or proteolytic fragments. |
| Homogeneity/Dispersity | Size-Exclusion Chromatography (SEC), Dynamic Light Scattering (DLS) | Oligomeric state, presence of aggregates, sample monodispersity. |
| Identity | Mass Spectrometry (intact or tryptic digest) | Confirmation of correct protein sequence and intactness. |
Protein Quality Control Workflow
The Scientist's Toolkit: Research Reagent Solutions
The following table details essential materials and reagents critical for successful protein purification and quality control in the context of creating hetero-protein systems.
Table 3: Essential Research Reagents for Protein Purification and QC
| Reagent / Material | Function / Application |
|---|---|
| Affinity Chromatography Resins | Selective binding and purification of tagged recombinant proteins (e.g., Ni-NTA for His-tagged proteins). |
| Protease Inhibitor Cocktails | Added to lysis and purification buffers to prevent protein degradation, preserving sample integrity [7]. |
| Detergents (e.g., NP-40, Triton X-100) | Aid in solubilizing membrane proteins or protein complexes; can be added to wash buffers to reduce non-specific binding [7]. |
| Reducing Agents (DTT, TCEP, β-Mercaptoethanol) | Prevent oxidation of cysteine residues and the formation of unwanted disulfide bonds, which can cause aggregation [7] [34]. |
| Size-Exclusion Chromatography (SEC) Columns | Critical for separating proteins by size, assessing sample homogeneity, and removing aggregates [16]. |
| Gentle Elution Buffers | Near-neutral pH, high-salt buffers for eluting proteins from affinity resins while minimizing denaturation, helping to preserve activity for functional assays [7]. |
Buffer and Ionic Strength Optimization for Native-State Stability
FAQs: Core Concepts
1. How do buffer pH and ionic strength directly impact protein stability during purification? The stability of a protein's native state is highly dependent on its environment. Buffer pH affects the ionization of amino acid side chains, influencing the protein's net charge and conformational stability. Ionic strength, governed by salt concentration, modulates electrostatic interactions within the protein and between protein molecules. An optimal balance is required; if the ionic strength is too low, it may not sufficiently shield electrostatic repulsion, while if it's too high, it can disrupt essential salt bridges and promote aggregation due to a "salting-out" effect. The goal is to identify conditions that maximize the free energy difference (ΔG) between the folded and unfolded states [36] [4].
2. What is the relationship between a protein's isoelectric point (pI) and my choice of ion exchange chromatography media? The pI is a critical parameter for selecting ion exchange media. You should use a cation exchanger (e.g., SP, CM) when your protein is most stable below its pI, as it will carry a net positive charge. Conversely, use an anion exchanger (e.g., Q, DEAE) when your protein is stable above its pI, where it carries a net negative charge. If the protein is stable over a wide pH range on both sides of its pI, either type of exchanger can be used. For a systematic approach, start with a strong ion exchanger, which maintains its charge over a broad pH range [36].
3. Why is my protein not binding to the ion exchange column, and how can I fix it? This common issue can have several causes and solutions [37]:
- Incorrect Ionic Strength: The ionic strength of your sample may be too high. Solution: Desalt or dilute your sample with start buffer.
- Incorrect pH: The buffer pH may be inappropriate for binding. Solution: For an anion exchanger, increase the buffer pH; for a cation exchanger, decrease the pH.
- Detergent Contamination: The column may be contaminated with detergent, which can interfere with binding.
4. What are some affordable and readily available additives to stabilize my protein in solution? Several small molecules can improve protein stability and solubility without requiring a significant investment [4]. These are often used in the low mM to percent range and work through various mechanisms, such as preferential exclusion or stabilizing the protein's hydration shell.
- Amino Acids: L-Arginine, L-Glutamate, L-Proline, Glycine, L-Lysine.
- Sugars and Polyols: Sucrose, Glycerol, Sorbitol.
- Other Osmolytes: Betaine, Proline.
Troubleshooting Guides
Table 1: Troubleshooting Ionic Strength and Buffer Issues in IEX
| Problem | Possible Cause | Recommended Solution |
|---|---|---|
| Sample elutes before gradient begins (proteins do not bind) [37] | Sample ionic strength too high; incorrect pH | Desalt/dilute sample. For anion exchange, increase buffer pH; for cation exchange, decrease pH. |
| Proteins elute late in gradient (bind too strongly) [37] | Buffer pH suboptimal; gradient ionic strength too low | For anion exchange, decrease buffer pH; for cation exchange, increase pH. Use a steeper or higher ionic strength gradient. |
| Target protein(s) not resolved [37] | Poorly optimized conditions | Re-optimize pH and gradient slope. Consider using a different counter-ion (e.g., K+, acetate) to alter selectivity [36]. |
| Poor run-to-run reproducibility | Inconsistent buffer preparation | Prepare buffers at the temperature they will be used. Do not dilute pH-adjusted stock solutions. Record and follow exact preparation procedures [38]. |
Table 2: Research Reagent Solutions for Stability Optimization
| Reagent / Material | Function / Explanation |
|---|---|
| Strong Ion Exchangers (Q, SP) | Maintain charge capacity over a wide pH range, ideal for initial method development and screening [36]. |
| Chaotropic Salts (NaCl, KCl) | Act as counter-ions in IEX with a low "salting-out" effect, helping to maintain protein solubility during elution [36]. |
| Thermostability Assays (nanoDSF) | Measure thermal unfolding (Tm, Tonset, Tagg) by monitoring intrinsic tryptophan fluorescence, providing a direct readout of stability under different buffer conditions [39] [4]. |
| Stabilizing Additives (e.g., Arg, Sucrose) | Improve protein stability and solubility by altering the solvent environment, helping to maintain the native state and prevent aggregation [4]. |
| Size Exclusion Chromatography (SEC) | Assesses protein homogeneity, monodispersity, and aggregation state after purification and buffer optimization [39]. |
Experimental Protocols
Protocol 1: Initial Screen for IEX Binding Conditions
This protocol helps establish starting conditions for ion exchange purification [36].
Key Materials:
- Strong Anion Exchange medium (e.g., Q) and/or Strong Cation Exchange medium (e.g., SP)
- Start buffers: 20 mM Tris or HEPES, pH 8.0 (Anion Exchange); 20 mM MES or Phosphate, pH 6.0 (Cation Exchange)
- Elution buffer: Start buffer + 1 M NaCl
- Chromatography system capable of gradient elution
Methodology:
- Equilibrate: Pack a small column (e.g., 1 mL) and equilibrate with 5-10 column volumes (CV) of start buffer until the UV baseline, pH, and conductivity are stable.
- Prepare Sample: Adjust the sample to the pH and ionic strength of the start buffer using desalting, dialysis, or dilution.
- Apply and Wash: Apply the sample to the column. Wash with 5-10 CV of start buffer until the UV baseline is stable, ensuring all unbound material is removed.
- Elute: Elute bound proteins using a linear gradient of 0-100% elution buffer over 10-20 CV.
- Strip and Re-equilibrate: Wash the column with 5 CV of 1 M NaCl (100% elution buffer) to remove strongly bound impurities, then re-equilibrate with 5-10 CV of start buffer.
Visual Workflow: Ion Exchange Chromatography Screening
Protocol 2: High-Throughput Stability Screening Using nanoDSF
This protocol uses intrinsic protein fluorescence to measure thermal stability under different buffer conditions, helping to identify formulations that maximize native-state stability [39] [4].
Key Materials:
- nanoDSF-capable fluorimeter
- Purified protein sample
- Plate with 96 different buffer/additive conditions
- Capillary tubes or plate suitable for the instrument
Methodology:
- Sample Dilution: Dilute the purified protein from its storage condition into the various screening conditions. A tenfold dilution is often sufficient to observe stabilization or destabilization effects [39].
- Loading: Load the samples into capillaries or the wells of a nanoDSF plate.
- Thermal Ramp: Subject the samples to a controlled temperature ramp (e.g., from 20°C to 95°C) while monitoring the intrinsic tryptophan fluorescence at 330 nm and 350 nm.
- Data Analysis: Plot the fluorescence ratio (350 nm/330 nm) or the signal at a single wavelength against temperature. Determine the melting temperature (Tm), which is the inflection point of the unfolding transition, and Tonset, the temperature where unfolding begins [39] [4].
- Selection: Prioritize buffer conditions that result in the highest Tm and Tonset values for downstream experiments.
Visual Workflow: High-Throughput Stability Screening
Solving Common Homogeneity Challenges: A Troubleshooter's Guide
Frequently Asked Questions (FAQs)
Membrane Proteins
Q1: Why is maintaining a native-like lipid environment so critical for membrane protein studies? The structure, function, and conformational flexibility of membrane proteins are intimately tied to their lipid environment [40]. Removing them from their native membrane can disrupt specific lipid-protein interactions, leading to protein denaturation, aggregation, and loss of function [41] [40]. Reconstitution into native-like membrane mimetics is essential for preserving biological activity during in vitro experiments [40].
Q2: What are the biggest hurdles in obtaining high-quality membrane protein samples? The primary challenges include:
- Low Abundance: Naturally low expression levels often require significant optimization of expression systems [41].
- Instability: Removal from the native lipid bilayer often renders the proteins unstable in aqueous solutions, leading to aggregation and precipitation [41] [40].
- Complex Extraction and Purification: The process of extracting proteins from the membrane with detergents or other agents without damaging their structure is technically demanding [41] [40].
Insoluble Aggregates
Q3: What causes insoluble aggregates to form in reconstituted protein samples? Insoluble aggregation can be triggered by stress during processing. For example, spray-drying proteins can disrupt their higher-order structure, exposing hydrophobic regions that drive aggregation through hydrophobic interactions upon reconstitution [42]. Similar mechanisms can occur due to shear stress, air-liquid interfaces, or freeze-thaw cycles.
Q4: How can I confirm that observed particles are insoluble protein aggregates and not something else? A combination of techniques is used. Microflow Imaging (MFI) can count and size particles [42]. Fourier Transform Infrared (FTIR) microscopy can then confirm the proteinaceous nature of the collected particles, distinguishing them from undissolved excipients or other contaminants [42].
Intrinsically Disordered Proteins (IDPs)
Q5: My protein sample lacks a stable 3D structure. Does this mean it is degraded or non-functional? Not necessarily. Many proteins or protein regions, known as Intrinsically Disordered Proteins (IDPs) or Regions (IDRs), are biologically active without adopting a fixed three-dimensional structure [43] [44]. This is known as the "disorder–function paradigm" [44]. You should validate functionality using activity assays specific to your protein.
Q6: How do I characterize a protein that is inherently unstructured? Techniques that study conformational ensembles are ideal. These include:
- Nuclear Magnetic Resonance (NMR) Spectroscopy: Provides atomic-resolution data on dynamics and transient structures [43].
- Hydrogen-Deuterium Exchange Mass Spectrometry (HDX-MS): Probes conformational dynamics and solvent accessibility, which can also be applied to study regions involved in aggregate formation [42].
- Analytical Size Exclusion Chromatography (SEC) with Multi-Angle Light Scattering (MALS): Determines the hydrodynamic radius and molecular weight of polydisperse samples, providing information on oligomeric state and dispersity [16].
Troubleshooting Guides
Troubleshooting Membrane Protein Purification and Stability
This guide addresses common issues encountered when working with membrane proteins.
Table 1: Troubleshooting Guide for Membrane Protein Issues
| Problem | Potential Cause | Recommended Solution | Key Experimental Controls |
|---|---|---|---|
| Low Expression | Protein toxicity to host; improper folding. | Use different expression hosts (e.g., insect, mammalian cells); optimize induction conditions [41]. | Test small-scale expressions; use a tagged protein for detection. |
| Low Stability & Activity | Loss of native lipid environment; use of harsh detergents. | Screen different detergents and lipids; use membrane mimetics like nanodiscs for reconstitution [41] [40]; add stabilizing lipids during purification. | Measure activity immediately after purification and over time. |
| Sample Aggregation | Denaturation during extraction; detergent instability; hydrophobic exposure. | Use milder detergents; incorporate lipids early in purification; optimize buffer conditions (pH, salt) [40]. | Analyze by SEC-MALS or DLS to monitor size and dispersity [16]. |
| Low Functional Yield | Only a fraction of the purified protein is active. | Perform activity assays parallel to concentration measurements; use traceable affinity tags for accurate quantification [16]. | Determine specific activity (activity per mg protein). |
Troubleshooting Insoluble Aggregates
This guide focuses on identifying and mitigating the formation of insoluble aggregates.
Table 2: Troubleshooting Guide for Insoluble Aggregate Issues
| Problem | Potential Cause | Recommended Solution | Key Analytical Techniques |
|---|---|---|---|
| High Particle Counts | Shear stress; surface-induced denaturation; contaminant nucleation. | Avoid vigorous mixing; use surfactants to protect interfaces; use ultra-pure buffers and filter solutions [42]. | Microflow Imaging (MFI) [42]; Light Obscuration. |
| Aggregates after Processing | Stress from drying, freezing, or temperature shifts. | Optimize process parameters (e.g., lower outlet temp in spray-drying) [42]; use cryoprotectants for freeze-thaw. | Compare SEC chromatograms before and after processing [42]. |
| Identification of Particles | Uncertainty about particle composition (protein vs. other). | Isolate particles and analyze their composition. | FTIR Microscopy (for proteinaceous nature) [42]; SDS-PAGE. |
| Understanding Aggregation Mechanism | Unknown structural region initiating aggregation. | Probe conformational changes in the aggregated state. | Hydrogen-Deuterium Exchange Mass Spectrometry (HDX-MS) [42]. |
Experimental Protocols
Protocol 1: Quality Control for Purified Protein Samples
Implementing this minimal set of quality control (QC) tests is essential for ensuring reproducible and reliable experimental data [16].
Table 3: Minimal Quality Control Tests for Protein Reagents [16]
| QC Test | Method | Purpose | Acceptance Criteria |
|---|---|---|---|
| Purity | SDS-PAGE, Capillary Electrophoresis (CE), Reversed-Phase LC (RPLC) | Assess sample purity and detect proteolysis or contaminating proteins. | A single major band at expected molecular weight; minimal contaminating bands. |
| Identity | Mass Spectrometry (MS) of intact protein or tryptic digest | Confirm the protein's identity and correct sequence. | Measured mass matches theoretical mass within instrument error. |
| Homogeneity/Dispersity | Size Exclusion Chromatography (SEC) coupled to Multi-Angle Light Scattering (MALS) or Dynamic Light Scattering (DLS) | Determine oligomeric state, size distribution, and detect soluble aggregates. | A monomodal peak with a polydispersity index (PDI) < 20% for DLS; mass consistent with expected oligomer. |
Workflow Diagram: Essential Protein Quality Control Pathway
Protocol 2: Analyzing the Mechanism of Insoluble Aggregation
This protocol uses HDX-MS to identify the structural regions involved in aggregate formation, as demonstrated in studies of spray-dried proteins [42].
- Generate and Reconstitute Aggregated Sample: Subject the protein to stress conditions known to cause aggregation (e.g., spray-drying, heat stress). Reconstitute the sample and collect the insoluble fraction via centrifugation [42].
- Separate Soluble and Insoluble Fractions: Centrifuge the reconstituted solution. The supernatant contains the soluble protein, while the pellet contains the insoluble aggregates [42].
- Perform Hydrogen-Deuterium Exchange (HDX):
- Dilute the soluble supernatant and the redissolved aggregate pellet into a D₂O-based buffer.
- Allow exchange to proceed for various time points (e.g., seconds to hours).
- Quench the reaction at low pH and temperature [42].
- Proteolysis and Mass Spectrometry Analysis:
- Digest the labeled protein with an acid-tolerant protease (e.g., pepsin).
- Analyze the resulting peptides using liquid chromatography-mass spectrometry (LC-MS) [42].
- Data Analysis: Calculate the deuterium uptake for each peptide across time points. Compare the uptake between the soluble and aggregated samples. Significant protection from deuterium uptake in the aggregates indicates regions that have become structured or buried during the aggregation process [42].
Workflow Diagram: Insoluble Aggregate Analysis via HDX-MS
The Scientist's Toolkit: Research Reagent Solutions
This table details key reagents and materials essential for addressing the sample-specific issues discussed above.
Table 4: Essential Research Reagents and Their Applications
| Reagent / Material | Function / Application | Specific Use-Case |
|---|---|---|
| Membrane Mimetics (Nanodiscs, Liposomes) | Provide a native-like lipid bilayer environment for stabilizing membrane proteins outside the cell [41] [40]. | Purification, reconstitution, and functional/biophysical studies of membrane proteins. |
| Detergents (DDM, LMNG) | Solubilize membrane proteins by mimicking the lipid environment, enabling their extraction and purification [41]. | Initial extraction of membrane proteins from lipid bilayers; maintaining solubility during purification. |
| Stabilizing Excipients (Sugars, Amino Acids) | Protect protein structure during stressful processes like drying or freezing by mechanisms like preferential exclusion and water replacement. | Formulation development for spray-dried or lyophilized proteins to prevent aggregation upon reconstitution [42]. |
| HDX-MS Reagents (D₂O, Pepsin) | Enable the study of protein conformational dynamics and solvent accessibility by tracking the exchange of hydrogen for deuterium [42]. | Probing structural changes, mapping binding interfaces, and identifying regions involved in aggregation. |
Troubleshooting Guides
Pressure-Related Issues
Problem: Sudden Pressure Drops or Fluctuations
Pressure instability in HPH systems often stems from similar fluidic issues found in HPLC systems, including air bubbles, seal failures, or partial blockages [45] [46].
| Symptom | Possible Cause | Recommended Solution |
|---|---|---|
| Pressure falls to zero and fluctuates [45] | Air bubbles in the system; Check valve issues [45] [47] | Purge the pump and fluidic path to remove trapped air; inspect check valves for debris or sticking [45] [46]. |
| General pressure fluctuations [46] | Worn pump seals; System obstructions [45] [46] | Inspect and replace worn piston seals; check for obstructions in the flow path [45]. |
| Low system pressure [47] | Leaks in the system [46] [47] | Check all fittings for leaks; tighten or replace damaged fittings [47]. |
| No pressure [47] | Major leak; air in system; pump failure [47] | Identify and fix leak source; purge system of air; check pump and check valves [47]. |
Problem: Unexpectedly High Pressure
Sudden pressure spikes are frequently caused by blockages in the system, often related to the sample itself or component failure [45] [47].
| Symptom | Possible Cause | Recommended Solution |
|---|---|---|
| Sudden pressure spikes [45] | Nozzle or interaction chamber blockage; sample contamination/aggregation | Inspect for blockages in nozzles and flow channels; check sample for particulates or high viscosity [45]. |
| Consistently high pressure [47] | Flow rate too high; tubing internal diameter too small | Lower the flow rate; ensure tubing and connectors are appropriate for the desired flow and pressure [47]. |
| High pressure after sample introduction | Sample concentration too high; protein aggregation at high pressure | Dilute the sample; consider incorporating a stabilizing agent into the sample buffer; optimize temperature. |
Sample Homogeneity and Dispersity Issues
Problem: Inconsistent Particle Size or Protein Aggregation
Achieving uniform dispersity is critical in purified protein research, and issues can arise from both sample preparation and homogenization parameters [48].
| Symptom | Possible Cause | Recommended Solution |
|---|---|---|
| Increased particle size post-HPH | Protein aggregation due to excessive shear or local heating | Reduce the number of homogenization cycles; pre-cool the sample and use a cooled sample reservoir; incorporate stabilizing excipients. |
| Broad or multimodal size distribution | Insufficient homogenization pressure or cycles; heterogeneous starting material | Increase the homogenization pressure within the protein's stability limit; ensure sample is well-suspended before HPH. |
| Loss of biological activity | Denaturation from cavitation or extreme shear forces | Lower the operating pressure and increase cycles gradually; use a milder homogenization valve geometry. |
Frequently Asked Questions (FAQs)
Q1: What is the fundamental relationship between HPH pressure and protein homogeneity? A1: Higher pressure generally leads to greater shear and cavitation forces, which can more effectively disrupt aggregates and reduce particle size. However, this must be balanced against the risk of protein denaturation. Excessive pressure can introduce excessive energy, leading to unwanted aggregation and loss of function. The optimal pressure is both protein-dependent and must be determined empirically [49].
Q2: How do I determine the optimal number of homogenization cycles? A2: The optimal number of cycles is typically found by monitoring the particle size and PDI (Polydispersity Index) of the sample after each pass. Initially, particle size decreases significantly with each cycle until a plateau is reached. Further cycles beyond this point may offer no improvement and could risk generating heat-induced aggregates. A cycle study (e.g., 1, 3, 5, 10 passes) is a standard experimental approach.
Q3: Why does my sample concentration significantly impact the outcome? A3: Sample concentration directly affects solution viscosity. Higher viscosity can dampen the intense shear and cavitational forces generated during HPH, reducing process efficiency. It can also promote protein-protein interactions, increasing the likelihood of aggregation post-homogenization. Dilution is often a simple and effective strategy to improve homogeneity [46].
Q4: How can I assess the success of my HPH optimization for protein samples? A4: Several analytical techniques are essential for characterization:
- Dynamic Light Scattering (DLS): Provides the hydrodynamic particle size distribution and Polydispersity Index (PDI), a key metric for dispersity [48].
- Analytical Size-Exclusion Chromatography (SEC): Effectively separates monomeric protein from aggregates and can quantify the amount of each species [49] [50].
- Negative Staining Electron Microscopy: Allows for direct visualization of particle morphology and conformational homogeneity, providing a qualitative assessment of sample state [48].
Q5: My protein is particularly sensitive. What strategies can I use to minimize stress during HPH? A5: For sensitive proteins, consider these approaches:
- Temperature Control: Always use a cooled sample reservoir and ensure the homogenizer itself is temperature-controlled to dissipate heat.
- Mild Detergents or Stabilizers: Incorporate excipients like sugars (e.g., trehalose, sucrose) or mild non-ionic detergents into the formulation buffer to protect the protein.
- Multi-Pass, Low-Pressure Strategy: Instead of a single high-pressure pass, use several cycles at a lower, gentler pressure to achieve the desired size reduction.
Experimental Protocols for Key Studies
Protocol 1: Systematic Optimization of HPH Parameters
This protocol outlines a structured Design of Experiment (DoE) approach to find the optimal pressure, cycle, and concentration window for a given protein sample.
1. Objective: To determine the combination of HPH parameters that yields the lowest particle size and polydispersity while maintaining protein stability.
2. Materials:
- Purified protein sample.
- High-Pressure Homogenizer.
- 0.22 µm syringe filters.
- Dynamic Light Scattering (DLS) instrument.
- Analytical SEC column (e.g., Superose 6 Increase 10/300 GL for large proteins/assemblies) [48].
- Sample buffers and excipients.
3. Method:
- Sample Preparation: Prepare the protein sample at three different concentrations (e.g., low, medium, high) in the desired formulation buffer. Filter all samples prior to homogenization to remove large initial aggregates.
- Experimental Design: Set up a factorial experiment.
- Pressure: Test a minimum of three levels (e.g., 5,000; 10,000; 15,000 PSI).
- Cycles: Test a minimum of three levels (e.g., 1, 3, 5).
- Concentration: Use the three prepared concentrations.
- Homogenization: Process each sample according to the defined parameter sets. Keep the sample on ice before and after processing.
- Analysis: Analyze each processed sample immediately using DLS to measure the Z-average diameter and PDI. Further analyze select promising conditions using analytical SEC to quantify the monomeric peak versus aggregates [50].
4. Data Analysis: Plot the particle size and PDI as a function of the three parameters. The goal is to identify the region where particle size is minimized, PDI is low (<0.2 is ideal for monodisperse samples), and the SEC monomer peak is maximized.
Protocol 2: Assessing Homogeneity via Gel Filtration Chromatography
This protocol uses gel filtration (Size-Exclusion Chromatography) to evaluate the homogeneity and molecular weight of the purified and homogenized protein [48].
1. Objective: To determine the oligomeric state and molecular weight of the protein after HPH processing.
2. Materials:
- AKTA or other FPLC system.
- Gel filtration column (e.g., Superose 6 Increase 10/300 GL).
- Gel filtration buffer (e.g., Ni buffer A: 20 mM Tris-HCl, 150 mM NaCl, pH 7.4).
- Protein molecular weight standards.
3. Method:
- System Equilibration: Connect the column to the system and equilibrate with at least 2 column volumes (CV) of gel filtration buffer at a recommended flow rate (e.g., 0.2 mL/min) [48].
- Standard Curve Generation:
- Prepare a mix of known protein standards covering a broad molecular weight range.
- Load the standard mix onto the column via a sample loop.
- Elute the column with 1.5-2 CV of buffer, recording the UV curve.
- Note the elution volume (Ve) for each standard.
- Plot the log(MW) versus Ve/Kav to create a standard curve.
- Sample Analysis:
- Load and run the HPH-processed protein sample under identical conditions.
- Record the elution volume of the main peak.
- Calculation: Use the elution volume of your protein peak and the standard curve to estimate its molecular weight. A single, symmetric peak indicates high homogeneity [48].
Experimental Workflow and Pathway Diagrams
HPH Parameter Optimization Workflow
The Scientist's Toolkit: Research Reagent Solutions
| Item | Function & Rationale |
|---|---|
| Stabilizing Buffers | Tris, Phosphate, or HEPES buffers maintain physiological pH, crucial for protein stability during the stressful HPH process. Buffer capacity should be sufficient to counter potential pH shifts [50]. |
| Excipients (Stabilizers) | Sugars (sucrose, trehalose), amino acids (glycine, arginine), and non-ionic detergents (Polysorbate 20/80) can protect proteins from shear-induced denaturation and surface adsorption, improving homogeneity [50]. |
| Molecular Weight Standards | A set of known proteins (e.g., Thyroglobulin, BSA, Ovalbumin, Ribonuclease A) is essential for calibrating gel filtration columns to determine the oligomeric state and molecular weight of the homogenized sample [48]. |
| Protease Inhibitor Cocktails | Added to the lysis and purification buffers to prevent proteolytic degradation during sample preparation, ensuring that the analyzed protein is intact. |
| Filter Membranes (0.22 µm) | Used to sterilize and clarify buffers and protein samples before HPH, removing pre-existing aggregates and particulates that could clog the homogenizer [46]. |
The Role of Fusion Tags and Expression Conditions in Initial Sample Quality
For researchers in drug development and basic science, obtaining pure, homogeneous, and monodisperse protein samples is a critical yet often challenging step. The initial quality of a protein sample is fundamentally shaped by two key strategic choices: the selection of an appropriate fusion tag and the optimization of expression conditions. Fusion tags are known proteins or peptides genetically fused to your protein of interest (POI) that can enhance solubility, enable purification, and facilitate detection [51]. When combined with precisely controlled expression parameters, these tools are powerful for overcoming common bottlenecks such as low solubility, improper folding, and host cell toxicity, thereby laying the foundation for high-quality structural and functional studies [52] [53].
Troubleshooting Guides
Problem 1: My Protein is Insoluble or Forms Inclusion Bodies
Question: My target protein consistently expresses in E. coli as insoluble inclusion bodies. What strategies can I use to improve soluble yield?
Answer: Insoluble expression is a major bottleneck. A multi-faceted approach involving fusion tags, expression tuning, and chaperone co-expression is often required.
Strategy 1: Employ a Solubility-Enhancing Fusion Tag Fusing your POI to a highly soluble partner can promote proper folding and prevent aggregation. The table below summarizes common and novel tags for this purpose.
Fusion Tag Approx. Size Key Mechanism of Action Key Advantage Consideration MBP [52] [53] ~42 kDa Acts as a solubility partner; strong affinity for amylose resin. One of the most effective solubility enhancers. Large size may affect POI structure/function. SUMO [52] ~11 kDa Enhances folding and solubility; allows precise cleavage. High specificity of SUMO protease enables clean tag removal. Requires purification of SUMO protease. SynIDP [54] <20 kDa Synthetic disordered proteins act as "entropic bristles" to prevent aggregation. Unstructured; minimal interference with POI activity; removal often unnecessary. Novel technology, less established. Trx [52] ~12 kDa Improves solubility, potentially by creating a more reducing environment. Effective for difficult-to-express proteins like cytokines. Limited direct use in purification. NusA [52] ~55 kDa A very strong solubility enhancer. Ideal for proteins that are highly insoluble with other tags. Very large size; typically needs to be removed. Strategy 2: Optimize Expression Conditions
- Lower Temperature: Induce protein expression at a lower temperature (e.g., 15–20°C) to slow down protein synthesis and facilitate proper folding [53].
- Tunable Expression: For toxic proteins or those prone to aggregation, use a tunable system like the Lemo21(DE3) strain with L-rhamnose to fine-tune expression levels, keeping the concentration of the POI just below the host's tolerance threshold [53].
- Chaperone Co-expression: Co-express molecular chaperones like GroEL, DnaK, and ClpB to assist with the folding of the target protein [53].
Experimental Protocol: Testing Tags for Solubility Rescue
- Clone your POI into a set of expression vectors containing different solubility tags (e.g., MBP, SUMO, SynIDP).
- Transform the plasmids into an appropriate E. coli expression strain (e.g., BL21(DE3) or a derivative).
- Induce expression in small-scale cultures (e.g., 10 mL) at a lower temperature (18°C) for 16-20 hours.
- Lyse the cells using sonication or lysozyme in a suitable buffer.
- Separate soluble and insoluble fractions by centrifugation at high speed (e.g., 15,000 x g for 20 minutes).
- Analyze the supernatant (soluble) and pellet (insoluble) fractions by SDS-PAGE to determine which tag yields the highest proportion of soluble protein.
Problem 2: Low or No Expression of My Target Protein
Question: I am getting very low yields of my protein. What host and vector factors should I investigate?
Answer: Low yields can stem from host cell toxicity, inefficient translation, or plasmid instability.
Strategy 1: Control Basal Expression Uncontrolled "leaky" expression before induction can inhibit cell growth and lead to plasmid loss.
- For T7 Systems: Use host strains that co-express T7 lysozyme, a natural inhibitor of T7 RNA Polymerase. Strains like T7 Express lysY or those carrying pLysS plasmids provide tighter control [53].
- For lac-based systems: Ensure your system supplies sufficient LacI repressor. Use host strains with the
lacIqgene, which increases repressor production ten-fold [53].
Strategy 2: Address Translational Inefficiency
- mRNA Secondary Structure: Troublesome secondary structures in the 5' untranslated region (UTR) or ribosomal binding site (RBS) can block translation. Alter the RBS sequence to more closely match the ideal E. coli sequence (AGGAGGT) and consider adding adenines after the initiation codon [53].
- Codon Usage: If your gene is rich in codons that are rare in E. coli, translation can stall. Either co-express a plasmid containing the genes for rare tRNAs (e.g., Rosetta strains) or redesign the gene sequence using host-preferred codons via gene synthesis [53].
The following workflow outlines a systematic approach to diagnose and address low protein expression:
Problem 3: His-Tagged Protein Fails to Bind to IMAC Resin
Question: My his-tagged protein flows through the immobilized metal affinity chromatography (IMAC) column instead of binding. What is wrong?
Answer: The most common reason for binding failure is that the polyhistidine tag is inaccessible due to the protein's 3D structure [55].
Strategy 1: Confirm Tag Inaccessibility Perform a binding test under denaturing conditions (e.g., in the presence of 6-8 M urea or guanidinium chloride). If the protein binds to the resin under these conditions, it confirms that the tag is buried in the natively folded protein [55].
Strategy 2: Make the Tag Accessible
- Introduce a Flexible Linker: Add a linker sequence rich in small, flexible amino acids like glycine and serine between the his-tag and your POI. This provides spatial separation and can prevent the tag from being buried [55].
- Switch Tag Position: If the tag is at the N-terminus, move it to the C-terminus, or vice versa. A different terminal location may be naturally more solvent-exposed [55].
- Optimize Binding Buffer: Ensure the pH of your binding buffer is not too low, as protonation of histidine side chains (pKa ~6.0) impairs metal coordination. Also, avoid excessive imidazole in the binding buffer, as it will compete with the his-tag for binding sites on the resin [55].
Frequently Asked Questions (FAQs)
FAQ 1: Is there a specific fusion tag I should always use?
No, there is no single "best" tag for all applications. The choice depends on your primary goal (e.g., purification, solubility, detection) and the properties of your specific protein [51]. Statistical analysis of thousands of purification records shows polyhistidine tags are used in over 80% of cases due to their small size and versatility, followed by GST and MBP which offer the dual benefit of affinity purification and solubility enhancement [31].
FAQ 2: What should I do if my fusion tag is not working?
If your initial tag strategy fails, systematically troubleshoot by [51]:
- Varying the location of the tag (N- vs. C-terminal).
- Changing the linker sequence between the tag and your protein (e.g., to a more flexible one).
- Attaching multiple different tags (tandem tagging) to leverage the advantages of each.
FAQ 3: My protein requires disulfide bonds for activity. Which expression system should I use?
For proteins requiring correct disulfide bond formation, the SHuffle strain from NEB is an excellent choice. These strains are engineered to have an oxidizing cytoplasm and express the disulfide bond isomerase DsbC in the cytoplasm, enabling the formation of proper disulfide bonds in the cellular compartment where your protein is expressed [53]. The alternative—exporting the protein to the periplasm using a signal sequence—can be less efficient for some targets.
FAQ 4: How do I choose an appropriate E. coli host strain for protein expression?
Select a strain based on your specific needs:
- For general expression: BL21(DE3) is common, but it can have high basal expression.
- For tight control of toxic proteins: T7 Express lysY or NEB Express Iq strains are superior as they better suppress expression before induction [53].
- For disulfide bond formation: Use engineered strains like SHuffle [53].
- For cloning and expression from the same strain: T7 Express and NEB Express strains carry the
endA1mutation, yielding higher quality plasmid DNA [53].
The Scientist's Toolkit: Key Research Reagent Solutions
The following table lists essential reagents and their functions for optimizing protein expression and purification.
| Reagent / Material | Primary Function | Example Use-Case |
|---|---|---|
| pMAL Vectors [53] | MBP fusion for solubility and purification. | Rescuing soluble expression of proteins that form inclusion bodies. |
| SHuffle E. coli Strains [53] | Cytoplasmic disulfide bond formation. | Producing active proteins that require correct disulfide bonding. |
| T7 Express lysY/Iq Strains [53] | Tight repression of basal expression. | Expressing proteins that are toxic to the host cell. |
| Lemo21(DE3) Strain [53] | Tunable expression level via L-rhamnose. | Finding the optimal expression level to balance yield and solubility. |
| SUMO Protease / TEV Protease [52] [54] | Highly specific cleavage of fusion tags. | Removing the fusion tag after purification with minimal scar residues. |
| IMAC Resins (Ni-NTA/Co-NTA) [55] | Affinity purification of his-tagged proteins. | Rapid, one-step purification of recombinant proteins. |
| Protease Inhibitor Cocktails [53] | Inhibition of host proteases. | Preventing degradation of the target protein during cell lysis and purification. |
Gy's Sampling Theory (TOS) provides a comprehensive framework for understanding and minimizing errors when extracting a representative sample from a larger heterogeneous lot. Developed by Pierre Gy, this theory is mathematically equivalent to Poisson sampling and is crucial for ensuring that analytical results reflect the true composition of the source material [56]. For researchers working with purified proteins, applying TOS principles is essential for obtaining reliable and reproducible data, as it directly addresses the challenges of protein homogeneity and dispersity.
Core Principles and Quantitative Framework
The Fundamental Sampling Error Equation
The core of TOS provides a quantitative prediction of the variance of the sampling error. For a binary mixture, the variance of the fundamental sampling error (FSE) is given by:
V = (1-q) / (q × Mbatch²) × Σ [mi² × (ai - abatch)²] [56]
Where:
- V: Variance of the sampling error.
- q: Probability of including a particle in the sample (constant for correct sampling).
- M_batch: Total mass of the population (lot) to be sampled.
- m_i: Mass of the i-th particle.
- a_i: Mass concentration of the property of interest in the i-th particle.
- a_batch: Mass concentration of the property of interest in the entire batch.
A more practical, simplified version of this equation is often used [57]:
σ² = C × d³ / m
Where:
- σ²: Variance due to the fundamental sampling error.
- C: Gy's constant, a factor dependent on the material properties (e.g., protein composition, buffer components).
- d: Diameter of the largest particles in the sample.
- m: Mass of the test portion.
This simplified form powerfully illustrates that the sampling error is proportional to the cube of the particle size and inversely proportional to the sample mass.
The Extended Gy's Formula
Recent work has extended Gy's formula to be more applicable to complex materials. The extended formula is exact and allows for the prediction of FSE for any particulate material with any number of particle classes, unlike the original formula which is primarily valid for binary mixtures [58]. This is particularly relevant for protein samples which may contain multiple aggregate species or impurities.
Troubleshooting Guides & FAQs
FAQ 1: Why is my measured protein concentration so variable between different test portions taken from the same purified sample?
This is a classic symptom of a fundamental sampling error, often caused by insufficient homogenization of the protein sample before aliquoting.
- Primary Cause: The presence of protein aggregates or particles makes the sample heterogeneous. According to Gy's formula, σ² ∝ d³, even a small number of large particles can drastically increase sampling variance [57].
- Solution:
- Implement a rigorous particle size reduction step (e.g., sonication, filtration).
- Ensure the sample is thoroughly mixed before drawing any test portions.
- Increase the test portion mass (
m) to compensate for existing heterogeneity, as per the formula.
FAQ 2: How small should I grind my lyophilized protein powder to ensure representative sampling for analysis?
The target particle size depends on your required precision and the mass of your test portion. Gy's theory provides the framework to calculate this.
- Guidance: Use the inverse relationship between particle size and test portion mass. The simplified equation, σ² = C × d³ / m, shows that halving the particle diameter (
d) allows for an eightfold reduction in the test portion mass (m) without increasing the sampling error [57]. - Action: For sensitive analyses like LC-MS, where test portions are small (e.g., 10-100 mg), aim for a particle size where the largest dimension is less than 100 µm. This often requires cryogenic milling for protein powders.
FAQ 3: My protein sample is in a viscous solution. How does this affect my sampling strategy?
Viscous solutions are prone to increment delimitation and extraction errors, two other types of sampling errors defined in TOS.
- Explanation: High viscosity can hinder mixing, leading to heterogeneity. It also makes it difficult to cleanly and completely extract a test portion, biasing your sample towards the more fluid components.
- Solution:
- Allow the sample to reach a consistent temperature and consider gentle agitation to reduce viscosity before sampling.
- Use wide-bore pipette tips or positive displacement pipettes to ensure the accurate and complete transfer of the intended volume.
- If possible, dilute the sample to a less viscous state while ensuring it does not affect protein stability or analysis.
FAQ 4: We are switching to a more sensitive LC-MS method that allows for smaller test portions. What is the biggest risk?
The biggest risk is increased sampling uncertainty [57]. A tenfold increase in analytical sensitivity does not automatically justify a proportional reduction in test portion size.
- Reason: From Gy's formula, if you reduce the test portion mass (
m) without improving sample homogeneity (reducingd), the fundamental sampling error variance (σ²) will increase. - Mitigation: When reducing test portion size due to improved detection limits, you must complement this with enhanced sample homogenization to reduce particle size (
d). Alternatively, you can increase the number of analytical replicates to average out the error.
Experimental Protocols for Assessing Homogeneity
Protocol for Particle-Size-Based Homogeneity Assessment using Laser Diffraction
This protocol is adapted from methods used to assess mycotoxin homogeneity and can be applied to lyophilized protein powders [59].
Principle: Laser diffraction measures the angular variation of light scattered by particles as they pass through a laser beam. The data is used to calculate the particle size distribution, which serves as a proxy for homogeneity.
Materials:
- Laser diffraction particle size analyzer (e.g., with a wet dispersion unit).
- Dispersant (e.g., methanol for protein powders, or a suitable aqueous buffer).
- Ultrasonic bath or probe.
- Magnetic stirrer.
Procedure:
- Dispersant Selection: Select a dispersant that wets the protein particles without dissolving them. Methanol is often suitable, but an appropriate buffer should be tested for stability [59].
- Dispersion Optimization: Add a representative subsample of your protein powder to the dispersant. Optimize the stirring rate (e.g., 3500 rpm) and apply ultrasonic energy to break up agglomerates without degrading the primary particles [59].
- Optical Parameter Setup: Input empirical values for the refractive index (e.g., 1.4-1.8) and absorption index (e.g., 0.001-0.1) into the instrument software, as actual values for complex food/protein matrices are often not available [59].
- Measurement: Perform sequential measurements (e.g., n=60) to ensure consistency. Record the Dv10, Dv50, and Dv90 values (the particle diameters at which 10%, 50%, and 90% of the sample's volume is comprised of smaller particles).
- Data Analysis: Low relative standard deviations (RSDs) for Dv10, Dv50, and Dv90 across measurements indicate a homogeneous suspension and, by proxy, a homogeneous sample [59].
Protocol for Homogeneity Assessment of a Soluble Protein using ISO Guide 35
This protocol directly assesses the heterogeneity of the analyte (protein) itself, which is the gold standard [57].
Principle: Multiple test portions are selected from the entire sample according to a random statistical pattern. The protein concentration in each portion is measured, and the results are analyzed using analysis of variance (ANOVA) to separate the within- and between-portion variances.
Materials:
- Purified protein sample.
- Analytical method for protein quantification (e.g., UV-Vis, BCA assay, LC-MS).
- Microbalance and precision pipettes.
Procedure:
- Sample Preparation: Ensure the protein solution is mixed according to your standard laboratory protocol.
- Subsampling: Randomly select at least 10 test portions from the entire sample. The portions should be taken from different locations within the container (top, middle, bottom).
- Analysis: Determine the protein concentration in each portion using a precise and accurate method. Analyze all portions under repeatability conditions (same analyst, same instrument, short interval).
- Statistical Evaluation: Use one-way ANOVA on the concentration data. The between-portion variance is used as an estimate of the heterogeneity of the sample. If the between-portion variance is not significantly larger than the within-portion variance (from method repeatability), the sample can be considered homogeneous.
Data Presentation
Key Formulae of Gy's Sampling Theory
Table 1: Core equations of Gy's Sampling Theory and their relevance to protein research.
| Formula | Variables | Application in Protein Research |
|---|---|---|
| General Formula:V = (1-q)/(q×Mbatch²) × Σ [mi² × (ai - abatch)²] [56] | V: Sampling error varianceq: Inclusion probabilitymi: Particle massai: Particle composition | Models the theoretical worst-case sampling error for a completely heterogeneous system. |
| Simplified Formula:σ² = C × d³ / m [57] | σ²: Fundamental sampling error varianceC: Material factor (heterogeneity)d: Max particle diameterm: Test portion mass | Practical tool for planning. Shows that halving particle size allows for an 8x smaller test portion. Critical for sizing LC-MS samples. |
| Extended Gy's Formula:(For complex mixtures) [58] | Allows for multiple particle classes with different compositions. | Ideal for protein samples containing monomers, aggregates, and fragments, providing a more exact error prediction. |
The Scientist's Toolkit: Research Reagent Solutions
Table 2: Essential materials and reagents for sample homogenization and particle size analysis.
| Item | Function | Considerations for Protein Samples |
|---|---|---|
| Cryogenic Mill | Grinds lyophilized protein powder to a fine, homogeneous particle size by embrittling the material with liquid nitrogen. | Prevents thermal degradation of the protein. Essential for achieving small particle sizes (d). |
| Wet Dispersion Unit & Dispersant | Used with laser diffraction analyzers to suspend and separate particles for size measurement. | The dispersant (e.g., methanol, buffer) must not dissolve or denature the protein. |
| Ultrasonic Probe | Applies high-frequency sound energy to break up particle agglomerates in a liquid suspension. | Optimize time and power to de-agglomerate without fracturing primary particles or shearing protein monomers. |
| Riffle Sample Splitter | Divides a dry, powdered sample into multiple representative portions based on geometric principles. | Ensures unbiased subsampling of lyophilized protein powders. Superior to "cone and quartering." |
| Refractive Index (RI) Standards | Used to calibrate and validate laser diffraction particle size analyzers. | While protein sample RIs are estimated, using known standards ensures instrument accuracy [59]. |
Workflow Visualization
Diagram 1: A systematic workflow for optimizing protein sampling to ensure representative results, integrating particle size reduction and homogeneity assessment based on Gy's theory.
Diagram 2: The logical relationship between the three key factors in Gy's simplified formula and the resulting Fundamental Sampling Error.
Choosing Your QC Arsenal: A Comparative Analysis of Validation Techniques
FAQs: Core Principles and Applications
Q1: Why are SEC-MALS, DLS, and SDS-PAGE considered a "gold standard" combination for assessing protein samples? These techniques provide complementary data on a protein's purity, molar mass, oligomeric state, and size, offering a comprehensive view of sample quality. SDS-PAGE assesses purity and integrity, SEC-MALS provides absolute molar mass and quantifies aggregates/oligomers, and DLS rapidly evaluates sample monodispersity and hydrodynamic size. Using them together cross-validates results and is strongly recommended for ensuring sample quality and research reproducibility [18] [16].
Q2: When should I use SEC-MALS instead of standard Size-Exclusion Chromatography (SEC)? Standard SEC relies on column calibration with reference standards, which assumes your protein has the same conformation and properties as those standards. SEC-MALS is an absolute method that does not require column calibration; it directly determines molar mass and size at each point in the chromatogram. This makes it essential for characterizing non-globular proteins, conjugated molecules (e.g., glycoproteins, PEGylated proteins), and complexes where calibration assumptions fail [60].
Q3: What is the key difference between the size information provided by DLS and SEC-MALS? SEC-MALS can determine the radius of gyration (Rg), which describes the root-mean-square distance of a molecule's mass from its center, providing insight into its overall shape and conformation. DLS measures the hydrodynamic radius (Rh), which is the radius of a hypothetical hard sphere that diffuses at the same rate as the protein. Comparing Rg and Rh can reveal if a protein is globular (Rg/Rh ~0.775) or extended [18] [60].
Q4: My SDS-PAGE gel shows a single band. Does this mean my protein is pure and monodisperse? Not necessarily. SDS-PAGE is excellent for detecting contaminating proteins and assessing integrity but has limitations. A single band only confirms homogeneity in molecular weight under denaturing conditions. It cannot detect the presence of soluble aggregates, identify the correct oligomeric state, or spot minor truncations. Further analysis with SEC-MALS and DLS is required to confirm native-state monodispersity and homogeneity [18] [16].
Troubleshooting Guides
SDS-PAGE Troubleshooting
This table addresses common issues encountered during SDS-PAGE analysis [61] [62].
| Problem | Possible Cause | Suggested Solution |
|---|---|---|
| Smeared Bands | Voltage too high | Decrease voltage by 25-50%; run at 10-15 V/cm for longer [61] [62]. |
| Protein concentration too high | Reduce the amount of protein loaded on the gel [61]. | |
| High salt concentration | Dialyze sample, precipitate with TCA, or use a desalting column [61]. | |
| Poor Band Resolution | Incorrect gel concentration | Use a gel with a different % acrylamide or a 4%-20% gradient gel [61]. |
| Run time too short or fast | Prolong the run; decrease voltage to slow migration [61] [62]. | |
| Improper running buffer | Remake running buffer with correct ion concentration and pH [62]. | |
| "Smiling" Bands | Uneven gel heating | Run gel in a cold room, use a cooled apparatus, or lower voltage to reduce heat [61] [62]. |
| Weak/Missing Bands | Protein ran off gel | Use a higher % acrylamide gel; stop run before dye front exits gel [61] [62]. |
| Protein degraded | Use protease inhibitors during purification; avoid freeze-thaw cycles [61] [7]. | |
| Low protein quantity | Increase sample concentration; use a more sensitive staining method [61] [18]. |
DLS (Dynamic Light Scattering) Troubleshooting
This table guides the interpretation of common DLS results and their solutions [18].
| Problem | Possible Cause | Suggested Solution |
|---|---|---|
| High Polydispersity Index (PDI) | Sample is heterogeneous (mixture of aggregates, oligomers, and monomer) | Optimize buffer conditions (pH, salt); filter sample (e.g., 0.1 µm); use a sizing technique like SEC to separate populations before DLS. |
| Presence of large, non-specific aggregates | Centrifuge sample at high speed before analysis; ensure protein is in a stable, formulated buffer. | |
| Multiple Peaks in Size Distribution | Sample contains specific oligomeric states (dimer, trimer, etc.) | Use SEC-MALS to confirm and quantify the different species. This may be a real feature of the sample. |
| Contamination from dust or debris | Filter all buffers and sample through a 0.1 µm or 0.02 µm filter; use clean labware. | |
| Unstable/Drifting Size Measurement | Protein is aggregating or precipitating over time | Perform a thermal stability assay (e.g., Thermofluor) to identify stabilizing buffer conditions [17]. |
SEC-MALS Troubleshooting
This table addresses issues specific to SEC-MALS experiments [60] [63].
| Problem | Possible Cause | Suggested Solution |
|---|---|---|
| Low Recovery/Protein Lost on Column | Protein binding to SEC stationary phase (non-ideal interactions) | Increase salt concentration (e.g., add 150-400 mM NaCl); change buffer pH; use a different SEC column chemistry. |
| Protein precipitation on column | Ensure sample is fully soluble and compatible with the mobile phase; consider adding a mild denaturant or detergent. | |
| Unexpected Molar Mass | Incorrect concentration (UV extinction coefficient or dn/dc value) | Measure protein concentration accurately; use a calculated or experimentally determined dn/dc value (typically ~0.185 mL/g for proteins). |
| Sample degradation or inhomogeneity | Analyze sample with SDS-PAGE and DLS first to check integrity and monodispersity [18]. | |
| Poor Separation/Peak Shape | Column is overloaded | Inject less protein mass onto the column. |
| Column is degraded or clogged | Follow column manufacturer's cleaning and storage guidelines. |
Essential Experimental Protocols
Protocol: Assessing Protein Purity and Integrity by SDS-PAGE
This is a standard protocol for SDS-PAGE analysis, incorporating best practices for sample preparation [61] [18] [62].
Sample Preparation:
- Mix protein sample with 1X SDS-PAGE loading buffer (containing SDS and a reducing agent like DTT or β-mercaptoethanol).
- Heat denature at 95-100°C for 5-10 minutes. Note: For some multi-membrane proteins, heating at a lower temperature (e.g., 60°C) is recommended to prevent aggregation [61].
- Centrifuge at high speed for 1-2 minutes to pellet any insoluble material.
Gel Electrophoresis:
- Load samples and a pre-stained protein ladder onto a precast or hand-cast polyacrylamide gel. Do not leave wells empty to prevent edge effect distortion; load a control sample or buffer in unused wells [62].
- Fill the tank with 1X SDS-PAGE running buffer.
- Run the gel immediately after loading samples. Start the power supply at a constant voltage (e.g., 80V through the stacking gel, then 120-150V through the resolving gel). Stop the run when the dye front is about to reach the bottom of the gel.
Staining and Visualization:
- Following electrophoresis, disassemble the gel unit and transfer the gel to a staining container.
- Stain with Coomassie Blue (detection limit ~100 ng) or a more sensitive fluorescent dye like SYPRO Ruby or Orange (detection limit ~1-10 ng) [18].
- Destain and image the gel.
Protocol: Rapid Monodispersity Check by DLS
This protocol is for a quick, low-volume DLS measurement to assess sample homogeneity [18].
Sample Preparation:
- Centrifuge the protein sample at >14,000 x g for 10-15 minutes to remove dust and large aggregates.
- Carefully pipette the supernatant into a clean, disposable microcuvette or a quartz cuvette. A minimum volume of 20-50 µL is typically required.
Instrument Measurement:
- Place the cuvette in the instrument and set the temperature.
- Set the number of measurements (e.g., 10-15 runs per measurement) and the duration of each run.
- Start the measurement. Ensure the photon count rate is within the instrument's optimal range.
Data Analysis:
- Examine the intensity-based size distribution plot. A monodisperse sample will show a single, sharp peak.
- Check the Polydispersity Index (PDI). A PDI value below 0.1 is considered monodisperse; values above 0.2 indicate a polydisperse sample.
- For a more accurate assessment of size distribution, analyze the mass- or volume-based distribution provided by the instrument software.
Protocol: Determining Absolute Molar Mass and Oligomeric State by SEC-MALS
This protocol outlines the key steps for a SEC-MALS experiment [60].
System Setup and Calibration:
- Ensure the SEC column is appropriate for your protein's size range.
- Equilibrate the FPLC/HPLC system and the column with at least two column volumes of your chosen mobile phase (e.g., 50-200 mM phosphate or HEPES buffer, pH 7.0-7.5, with 100-300 mM NaCl). The mobile phase must be filtered through a 0.1 µm or 0.02 µm filter.
- The MALS and dRI/UV detectors should be calibrated according to the manufacturer's instructions.
Sample Preparation and Injection:
- Clarify the protein sample by centrifugation and filtration (0.1 µm or 0.02 µm filter).
- Load an appropriate volume (e.g., 50-100 µL) containing a known mass of protein (typically 0.5-2 mg/mL, depending on the system).
Data Collection and Analysis:
- Run the isocratic method at a constant, low flow rate (e.g., 0.5-1.0 mL/min) to ensure good separation.
- The ASTRA or equivalent software will collect data from the UV, MALS, and dRI detectors simultaneously.
- The software will calculate the absolute molar mass across the entire chromatogram peak. The average molar mass across the peak apex corresponds to the oligomeric state of your protein (e.g., ~66 kDa for BSA monomer, ~132 kDa for BSA dimer) [60].
Workflow Visualization
Protein Characterization Workflow
Research Reagent Solutions
The following table lists key reagents and materials essential for experiments using the gold standard toolkit [61] [18] [17].
| Reagent/Material | Function in the Toolkit |
|---|---|
| SYPRO Orange Dye | A fluorescent dye used in Thermofluor/DSF assays to monitor protein thermal stability by binding to hydrophobic patches exposed upon unfolding [17]. |
| High-Purity SEC Columns | Columns with minimal surface interactions for separating protein complexes and aggregates by hydrodynamic size prior to MALS and RI detection. |
| Precast SDS-PAGE Gels | Consistent, ready-to-use polyacrylamide gels for assessing protein purity and molecular weight, available in various percentages and gradients [61]. |
| DNase/RNase & Protease Inhibitors | Added during cell lysis and purification to prevent sample degradation by nucleases and proteases, preserving protein integrity [7]. |
| Size Standards | Protein ladders for SDS-PAGE and molar mass standards for SEC-MALS system validation. |
| Ultra-Pure Buffers & Salts | Essential for preparing mobile phases and sample buffers to minimize light scattering background from particulates and ensure reproducible results. |
Mass Photometry Troubleshooting Guide
Frequently Asked Questions
Q1: My mass photometry measurements have a high background noise level. What could be the cause? High background noise is often related to your buffer composition. Certain buffer components, particularly detergents above their critical micelle concentration (CMC), can cause unacceptable levels of background noise [64]. Other common culprits include high glycerol concentrations (above 5% v/v) and insufficiently filtered buffers. For optimal results, always filter all buffers with 0.22 μm syringe filters before use and avoid carrier proteins in your buffer system [64].
Q2: Why am I not detecting enough molecular landing events in my mass photometry experiment? This issue typically stems from two main causes:
- Insufficient sample concentration: The optimal concentration range for mass photometry is approximately 10-50 nM. If you are using gasket wells, remember that your sample is diluted during the loading process; prepare a 40 nM solution to achieve a final measurement concentration of ~20 nM [64].
- Sample loss due to surface adhesion: Proteins at nanomolar concentrations are prone to adhering to vial surfaces. To mitigate this, you can test different vial materials, passivate vials with casein solution, and avoid repeated pipetting or vortexing of dilute samples [64].
Q3: My sample forms aggregates at high concentrations, making mass photometry analysis difficult. Is there a solution? Yes, this is a common challenge, especially when studying protein-protein interactions at high nanomolar to low micromolar concentrations. A recently developed method uses nanoparticle lithography combined with surface PEGylation to create a passivated surface with nanoscale defects. This reduces the frequency of molecular landing events by up to two orders of magnitude, enabling accurate measurements at concentrations as high as 1 μM, which would normally saturate a standard glass surface [65].
Q4: How can I verify that my sample is monodisperse and suitable for structural biology techniques like cryo-EM? Mass photometry is an excellent tool for this purpose. A monodisperse, homogeneous sample will produce a single, sharp peak in the mass histogram corresponding to the expected molecular mass of your target complex. Additional peaks or a broad distribution indicate sample heterogeneity, aggregation, or the presence of degradation products. This quick check (under 5 minutes) can prevent wasted resources on downstream structural biology applications [66].
Q5: What are the critical steps in sample preparation for reliable mass photometry data? The following protocol outlines the key steps for robust sample preparation and measurement [64]:
- Instrument Warm-up: Turn on the mass photometer at least one hour before measurement for thermal equilibration.
- Surface Preparation: Clean coverslips thoroughly with solvents and dry with nitrogen. Use high-quality coverslips and identify the optimal "working side" for measurement.
- Buffer Preparation: Filter all buffers with a 0.22 μm syringe filter. Avoid low-salt buffers (<10 mM) and high glycerol content.
- Sample Preparation: Determine protein stock concentration accurately via UV absorbance at 280 nm. Dilute the sample to a final concentration of 20-40 nM, depending on your sample chamber (flow chamber vs. gasket well). Filter protein stocks or centrifuge them to remove aggregates.
- Data Acquisition: Load the sample and acquire data for 60-120 seconds (60,000-120,000 frames). Monitor the landing event density to ensure it is optimal for single-molecule detection.
Troubleshooting Common Problems
The table below summarizes common issues, their potential causes, and solutions.
| Problem | Possible Cause | Solution |
|---|---|---|
| High background noise [64] | Detergents above CMC, dirty coverslip, unfiltered buffer | Use filtered buffers, thoroughly clean coverslips, avoid detergents above CMC. |
| Low number of landing events [64] | Sample concentration too low, sample loss to vial walls | Confirm stock concentration, optimize dilution, use passivated vials to prevent adhesion. |
| Poor mass resolution [67] | Unstable focus, incorrect buffer conditions | Use autofocus, ensure salt concentration >10 mM, optimize buffer composition. |
| Inability to measure at high concentrations [65] | Surface saturation preventing single-molecule detection | Use a PEGylated surface prepared with nanoparticle lithography to reduce binding frequency. |
| Signal loss over time [64] | Sample degradation, focus drift | Keep samples on ice until measurement, use autofocus feature, ensure sample stability. |
Experimental Protocols
Detailed Protocol: Molecular Mass Determination by Mass Photometry
This protocol is adapted from the standard operating procedure for determining protein molecular mass distributions by mass photometry [64].
1. Instrument and Material Preparation
- Instrument: Turn on the mass photometer and allow at least 60 minutes for thermal equilibration.
- Coverslips: Clean 24 x 50 mm glass coverslips sequentially with water, ethanol, and isopropanol. Dry with a stream of clean nitrogen. Identify the high-quality "working side" of the coverslip by testing with a water droplet; the root mean square (RMS) deviation of the mass photometry image should be ≤ 0.05%.
- Sample Chambers: Assemble a flow chamber (to avoid sample dilution) or attach a silicone gasket well to the cleaned coverslip.
- Buffers and Samples: Filter all buffers through a 0.22 μm filter. Determine protein stock concentration accurately by measuring UV absorbance at 280 nm. Filter protein stocks or centrifuge them at maximum speed in a tabletop centrifuge for 10 minutes to remove aggregates.
2. Sample Preparation
- Prepare a 50 μL protein solution at the target measurement concentration.
- For flow chambers, the final measurement concentration should be ~20 nM.
- For gasket wells, prepare a 40 nM solution, which will be diluted to ~20 nM upon mixing with the buffer already in the well.
- Note: Protein solutions at nanomolar concentrations are prone to surface adhesion. Use low-adsorption vials and avoid unnecessary handling to prevent sample loss.
3. Data Acquisition
- Place a drop of immersion oil on the objective and position the prepared sample chamber on the stage.
- Load 10 μL of clean, filtered buffer into the sample chamber.
- Focus the objective on the glass-buffer interface and engage the autofocus.
- Load the protein sample.
- For flow chambers, load 20 μL of the 20 nM sample to fully replace the buffer.
- For gasket wells, load 10 μL of the 40 nM solution into the well and mix gently with the pipette tip.
- Start data acquisition. A typical acquisition time is 60-120 seconds. Ensure the landing event density is optimal—events should be spatially and temporally separated for accurate single-molecule analysis.
4. Data Analysis
- The software will generate a molecular mass histogram from the detected single-molecule events.
- The resulting distribution reveals the sample's composition, including the relative abundance of different oligomeric states or complexes.
Mass Photometry Workflow
Advanced Protocol: Extending Concentration Range via Surface PEGylation
This advanced protocol allows for mass photometry measurements at concentrations up to 1 μM, enabling the study of weaker protein-protein interactions [65].
- Surface Amination: Begin with an aminated glass coverslip to provide a positively charged surface.
- Nanoparticle Masking: Sparsely decorate the aminated surface with silica nanospheres (SNPs). The size (e.g., 50 nm or 100 nm) and concentration of SNPs will determine the density of non-passivated areas.
- Cloud-Point PEGylation: Covalently attach a dense layer of polyethylene glycol (PEG) brushes to the entire surface using the cloud-point PEGylation method. The SNPs act as a mask, protecting the underlying surface.
- Nanoparticle Removal: Remove the silica nanospheres by sonication, leaving behind nanoscale holes in the PEG brush layer.
- Measurement: Perform mass photometry as described in the standard protocol. The nanoholes provide defined sites for molecular binding, drastically reducing the landing event frequency and allowing for single-molecule detection even at high μM analyte concentrations.
High-Concentration Surface Prep
The Scientist's Toolkit: Research Reagent Solutions
The table below lists key materials and reagents essential for successful mass photometry experiments.
| Item | Function | Key Considerations |
|---|---|---|
| High-Quality Coverslips [64] | Measurement surface; critical for image quality. | Opt for 24 x 50 mm size. Test both sides to identify the optimal "working side" with low RMS background. |
| Filtered Buffers [64] | Provides native-like environment for the sample. | Always filter through 0.22 μm syringe filter. Salt concentration should be >10 mM. Avoid high glycerol (>5% v/v). |
| Silica Nanospheres (SNPs) [65] | For creating nanoscale masks during surface PEGylation to enable high-concentration measurements. | Available in different diameters (e.g., 50 nm, 100 nm). Concentration and size tune the landing event density. |
| Polyethylene Glycol (PEG) [65] | Forms a polymer brush layer for surface passivation, reducing non-specific binding. | Cloud-point PEGylation method creates a dense brush for outstanding passivation performance. |
| Low-Adsample Vials [64] | Storage of dilute protein samples prior to measurement. | Prevents loss of sample due to adhesion to vial walls. Vials can be passivated with casein solutions. |
| Phosphocellulose Resin [68] | For final polishing purification of proteins (e.g., tubulin) via FPLC prior to mass photometry analysis. | Requires activation and equilibration with appropriate buffers (e.g., MES, PEM) before use. |
Comparison of Key Protein Purification Methods
The following table summarizes the key characteristics of common protein purification methods to help you select the optimal technique for your specific needs.
| Method | Basis of Separation | Typical Resolution | Sample Volume Considerations | Throughput & Speed | Key Advantages | Key Limitations |
|---|---|---|---|---|---|---|
| Dialysis [69] [70] | Size (via membrane) | Low (buffer exchange) | Versatile; typically <250 mL [70] | Low; time-consuming (hours) [70] | Gentle, preserves protein integrity, good for buffer exchange [70] | Slow, not for protein-protein separation, risk of protein loss [69] |
| Desalting [70] | Size exclusion | Low (desalting) | Limited input volume; small volumes (<10 mL) [70] | High; simple and quick procedure [70] | Fast salt removal, compatible with organic solvents [70] | Limited sample volume, may alter protein properties [70] |
| Precipitation [69] | Solubility | Low | Good for large volumes | High; quick | Inexpensive, good for initial concentration [69] | Low purity, may denature protein [69] |
| Gel Filtration Chromatography [69] | Molecular size | Medium | Limited by column size | Medium; can be slow [69] | Gentle, maintains protein activity, reproducible [69] | Limited resolution, slow [69] |
| Ion Exchange Chromatography [69] [71] | Net charge | High | Highly scalable [69] | High | High resolution, scalable [69] | Sensitive to pH and salt conditions [69] |
| Affinity Chromatography [69] [71] | Specific ligand binding | Very High | Highly scalable [69] | High | Very high purity in a single step, selective, efficient [69] | Expensive, requires known ligand [69] |
| Hydrophobic Interaction Chromatography [69] [71] | Hydrophobicity | Medium to High | Scalable [69] | Medium | Excellent for intermediate purification steps [69] | Requires high salt, may reduce solubility [69] |
Experimental Protocols for Key Methods
Protocol 1: Affinity Chromatography Followed by Size Exclusion Chromatography (SEC)
This two-step protocol is a robust strategy for obtaining high-purity, monodisperse protein samples suitable for structural biology or biophysical analysis [71].
Cell Lysis and Clarification
- For intracellular proteins: Resuspend the cell pellet in a suitable lysis buffer. Lyse cells using your method of choice (e.g., sonication, high-pressure homogenization). Centrifuge the lysate at high speed (e.g., >15,000 × g) to remove cell debris. The soluble fraction contains your protein of interest [71].
- For secreted proteins: Centrifuge the culture medium to remove cells. The supernatant contains your target protein [71].
Affinity Chromatography
- Equilibrate the affinity resin (e.g., Ni-NTA for His-tagged proteins, Glutathione Sepharose for GST-tagged proteins) with several column volumes of binding buffer.
- Load the clarified lysate or supernatant onto the column.
- Wash the column with binding buffer to remove unbound and weakly bound contaminants.
- Elute the bound protein using a competitive ligand (e.g., imidazole for His-tags, reduced glutathione for GST-tags) or by changing the pH. Collect the eluate in fractions.
Tag Cleavage (Optional)
- If a protease cleavage site was incorporated, dialyze or desalt the pooled elution fractions into an appropriate buffer to remove the competitive ligand.
- Incubate the protein with the specific protease to remove the affinity tag.
- Pass the sample back over the original affinity column to capture the freed tag and the protease, while your target protein flows through [71].
Size Exclusion Chromatography (SEC) - Polishing Step
- Equilibrate the SEC column with your final storage or assay buffer.
- Concentrate the protein sample from the previous step.
- Load the concentrated sample onto the SEC column. Proteins will separate based on their size and hydrodynamic radius.
- Collect the eluate in fractions. Analyze the fractions by SDS-PAGE to assess purity and to identify those containing the target protein, which should elute as a single, symmetric peak. This step also serves as a quality control to assess the oligomerization state of your protein [71].
Concentration and Storage
- Pool the pure fractions and concentrate using a centrifugal concentrator with an appropriate molecular weight cut-off.
- Determine the protein concentration by measuring the absorbance at 280 nm.
- Aliquot the protein, flash-freeze in liquid nitrogen, and store at -80°C to preserve stability and avoid repeated freeze-thaw cycles [71].
Protocol 2: Desalting and Buffer Exchange via Size-Exclusion Chromatography
This protocol provides a rapid method for removing salts, small molecules, or exchanging a protein into a different buffer [70].
Column Selection and Equilibration
- Select a desalting column or spin column with a size exclusion resin whose pore size excludes your target protein but includes the small molecules you wish to remove.
- Equilibrate the column with at least 3-5 bed volumes of your desired final buffer (the "exchange buffer").
Sample Preparation
- Ensure your protein sample volume does not exceed the manufacturer's recommended maximum load volume for the column (typically 10-30% of the bed volume).
Sample Application and Elution
- For gravity-flow columns: Load the sample onto the center of the resin bed. Allow the sample to fully enter the resin. Add exchange buffer and begin collecting fractions. The protein will elute in the void volume, separated from the slower-moving small molecules [70].
- For spin columns: Load the sample onto the column. Centrifuge the column for the recommended time and speed. The collected flow-through contains your desalted protein [70].
Analysis
- Analyze the protein-containing fractions or flow-through to confirm successful buffer exchange and protein recovery.
Frequently Asked Questions (FAQs)
Q1: I need to exchange the buffer for my sensitive enzyme, but I'm concerned about losing activity. Dialysis or desalting? For sensitive proteins that are prone to denaturation, dialysis is generally the preferred method. It is a gentler process that helps maintain protein stability over a longer period. Desalting, while faster, involves passing the protein through a column, which can sometimes lead to shear stress or altered properties [70].
Q2: My protein is in a small volume (<1 mL) and I need to remove salt quickly for a downstream assay. What should I use? For small sample volumes where speed is critical, desalting is the recommended approach. Desalting spin columns can process samples in a matter of minutes, making them ideal for this scenario [70].
Q3: After affinity chromatography, my protein is still not pure. What is a good next step? A combination of Ion Exchange Chromatography (IEX) and Size Exclusion Chromatography (SEC) is a standard and effective strategy. IEX provides high resolution based on charge, while SEC acts as a polishing step to remove aggregates and transfer the protein into the final storage buffer [71].
Q4: How can I assess the success of my purification and the homogeneity of my final sample? Size Exclusion Chromatography (SEC) is a critical tool for this. A single, symmetric peak in the SEC chromatogram is a strong indicator of a monodisperse sample. You should also analyze your final fractions by SDS-PAGE to confirm high purity and use other biophysical techniques (e.g., Dynamic Light Scattering) to check for aggregation [71].
Q5: What is the biggest bottleneck in scaling up protein purification for industrial applications? The high cost of specialized instruments and consumables, such as chromatography systems and resins, is a major market restraint. However, technological advancements are continuously improving throughput and efficiency to address this challenge [72].
Troubleshooting Common Experimental Issues
Problem: Low protein yield after affinity chromatography.
- Possible Cause 1: Inefficient binding to the resin.
- Solution: Check the pH and composition of the binding buffer to ensure it is optimal for your protein-tag interaction. Incubate the sample with the resin for a longer time with gentle mixing.
- Possible Cause 2: Protein is not eluting.
- Solution: Ensure the elution buffer is fresh and correctly prepared. Try a step-wise or gradient elution. Check if the tag has been cleaved proteolytically during cell lysis.
Problem: Protein is insoluble and forms inclusion bodies.
- Possible Cause: The protein is not folding correctly in the host cell.
- Solution: Consider lowering the expression temperature. Alternatively, purify the protein from inclusion bodies under denaturing conditions (e.g., using 8 M urea or 6 M guanidinium hydrochloride) and then attempt to refold the protein using dialysis or rapid dilution into a suitable refolding buffer. Be aware that refolding requires extensive screening of conditions [71].
Problem: Protein is pure but appears aggregated after SEC.
- Possible Cause 1: The protein is unstable in the storage buffer.
- Solution: Perform a buffer screen using a thermal shift assay to identify conditions that stabilize your protein. Additives like glycerol or salts can help.
- Possible Cause 2: The protein concentration is too high.
- Solution: Concentrate the protein to a lower concentration to minimize protein-protein interactions that lead to aggregation.
The Scientist's Toolkit: Research Reagent Solutions
| Item | Function in Protein Purification |
|---|---|
| Affinity Resins | Enable high-purity capture of target proteins using specific interactions (e.g., His-tag/Ni-NTA, GST/Glutathione) [71]. |
| Ion Exchange Resins | Separate proteins based on their net surface charge, providing high resolution as an intermediate purification step [69] [71]. |
| Size Exclusion Resins | Separate proteins by size and shape; used as a final polishing step to remove aggregates and for buffer exchange [71]. |
| Desalting Columns | Rapidly remove salts and other small molecules from protein samples via size exclusion chromatography [70]. |
| Dialysis Membranes | Allow for slow buffer exchange and removal of small molecules through a semi-permeable membrane [69] [70]. |
| Lysis Buffers | Facilitate cell disruption while maintaining the stability and solubility of the target protein [71]. |
| Protease Inhibitors | Prevent proteolytic degradation of the target protein during the purification process. |
| Chaotropic Agents | Solubilize proteins from insoluble inclusion bodies (e.g., Urea, Guanidinium HCl) [71]. |
Workflow for Selecting a Purification Method
The impact of cryo-electron microscopy (cryo-EM) on structural biology has been transformational, providing atomic-level insights into complex biomolecular assemblies. However, despite its power, the success of any cryo-EM experiment rests heavily on one critical factor: the quality of the starting sample. Sample heterogeneity, aggregation, and dynamic oligomeric states can compromise cryo-EM outcomes, leading to low-quality micrographs, noisy datasets, and wasted instrument time [66]. Since so much hinges on sample quality, effective pre-screening is essential, yet conventional tools such as dynamic light scattering (DLS), size-exclusion chromatography (SEC), and negative stain electron microscopy (ns-EM) often fall short due to limitations in resolution, speed, and sample requirements [66] [16].
This case study examines the integration of mass photometry as a strategic pre-screening tool to de-risk cryo-EM workflows. Mass photometry is a bioanalytical technology that measures the mass of individual biomolecules in solution under native conditions, providing rapid quantitative insights into sample composition, heterogeneity, and oligomeric distributions [73]. We will explore its practical implementation through technical guidelines, troubleshooting advice, and experimental protocols designed to enhance protein homogeneity and dispersity—key factors for successful high-resolution structural determination.
Technical FAQs: Mass Photometry Fundamentals
What is mass photometry and how does it work? Mass photometry is a label-free technique that measures the mass of single biomolecules in solution by quantifying interferometric scattering. As individual molecules land on a glass slide, they scatter incident light. This scattered light interferes with light reflected from the glass surface, producing a contrast signal directly proportional to the molecule's mass [73] [74]. The resulting measurements provide a histogram displaying the mass distribution of all species present in a sample, enabling researchers to assess sample homogeneity, identify oligomeric states, and detect aggregates or degradation products [75].
How does mass photometry compare to traditional sample characterization methods? Unlike bulk techniques that provide ensemble averages, mass photometry offers single-particle resolution, revealing sample heterogeneity that other methods may miss [66]. The table below compares key characteristics of mass photometry against traditional biophysical techniques used in cryo-EM sample screening.
Table 1: Comparison of Sample Characterization Techniques for Cryo-EM
| Technique | Measurement Time | Sample Consumption | Key Output | Limitations |
|---|---|---|---|---|
| Mass Photometry | ~1-5 minutes [75] | 10-20 µL at nM concentrations [75] | Molecular mass distribution | Mass range 30 kDa - 5 MDa [75] |
| Negative Stain EM | Several hours [66] | Variable | 2D particle images | Staining artifacts, non-native conditions [66] |
| Dynamic Light Scattering | Minutes | ~50 µL | Hydrodynamic radius | Sensitive to aggregates, low resolution [66] |
| SEC-MALS | 20-60 minutes [66] | >50 µL at µM concentrations [66] | Molecular mass & size | Sample dilution, may destabilize proteins [66] |
What are the minimal sample requirements for mass photometry? Mass photometry requires minimal sample preparation and consumption. Optimal measurements typically need only 10-20 µL of sample at concentrations in the low nanomolar range (100 pM - 100 nM) [75] [73]. The technique is compatible with a wide range of standard buffers and does not require labeling or staining, preserving native protein conditions [75]. For membrane proteins, mass photometry works with detergents and membrane mimetics, allowing characterization in near-native environments [66] [75].
Troubleshooting Guide: Common Scenarios and Solutions
Scenario 1: Sample shows unexpected mass peaks Problem: Mass photometry reveals additional peaks beyond the expected molecular mass, indicating sample heterogeneity [66]. Solutions:
- Check buffer compatibility: Ensure the buffer composition matches the protein's native environment. Perform buffer screening using mass photometry's rapid measurement capability [75].
- Verify purification tags: Confirm that purification tags have not proteolyzed, which can cause mass shifts. Use mass photometry to check sample integrity after each purification step [16].
- Assess oligomeric equilibrium: If peaks correspond to multiples of expected mass, the protein may exist in equilibrium between oligomeric states. Test different buffer conditions (pH, salt, additives) to stabilize the desired oligomer [73].
Scenario 2: High background signal or poor data quality Problem: Measurements show excessive noise, making peaks difficult to distinguish. Solutions:
- Optimize sample concentration: Dilute samples to achieve 100-200 particles per frame. Too high concentration causes overlapping signals; too low yields poor statistics [73].
- Clean sample carriers thoroughly: Ensure MassGlass slides are properly cleaned to remove contaminants that contribute to background noise [75].
- Check for bubble formation: Bubbles introduced during pipetting can scatter light. Centrifuge samples briefly before loading and pipette carefully [76].
Scenario 3: Discrepancy between mass photometry and cryo-EM results Problem: Samples that appear monodisperse by mass photometry show heterogeneity in cryo-EM. Solutions:
- Consider grid preparation effects: The cryo-EM grid preparation process itself can induce aggregation or disassembly. Use mass photometry to check samples both before and after grid freezing [66].
- Account for surface interactions: Some proteins may behave differently on the mass photometry glass surface versus cryo-EM grids. Validate with complementary techniques in solution [77].
- Check temporal stability: Sample degradation over time can occur. Use mass photometry for immediate assessment prior to grid preparation [16].
Experimental Protocols: Integrating Mass Photometry into Cryo-EM Workflows
Standard Operating Procedure for Pre-Cryo-EM Sample Screening
Materials and Equipment:
- Refeyn TwoMP mass photometer or equivalent system [75]
- MassGlass sample carrier slides [75]
- Protein sample at typical concentration of 1-100 nM [73]
- Appropriate calibration standards (e.g., native protein standards for mass calibration) [73]
Procedure:
- Instrument Calibration: Turn on the mass photometer and allow it to warm up for 30 minutes. Perform calibration using protein standards of known mass that cover your expected mass range [73].
Sample Preparation:
- Dilute protein sample to appropriate concentration (typically 1-100 nM) using the same buffer that will be used for cryo-EM.
- Centrifuge at 10,000-15,000 × g for 10 minutes to remove any large aggregates or particulates [66].
- Prepare 10-20 µL of diluted sample for measurement.
Measurement:
- Place 10-20 µL of sample onto a clean MassGlass slide.
- Focus the instrument and acquire data for 60 seconds or until sufficient particles (typically 1,000-10,000) have been detected for good statistics [75].
- Repeat measurement 2-3 times to ensure reproducibility.
Data Interpretation:
- Analyze the resulting mass histogram for the presence of the expected species, additional peaks indicating heterogeneity, or broad distributions suggesting polydispersity.
- A sample suitable for cryo-EM should show a single dominant peak corresponding to the expected molecular mass with minimal aggregates or subpopulations [66].
Decision Point:
- If the mass photometry profile shows >80% of the sample in the desired oligomeric state with minimal aggregates, proceed to cryo-EM grid preparation.
- If significant heterogeneity is detected, optimize buffer conditions or repurify before proceeding [66].
Workflow Visualization: Integrated Sample Preparation Pipeline
The following diagram illustrates the strategic integration of mass photometry within the cryo-EM sample preparation workflow, highlighting key decision points for de-risking the process.
Research Reagent Solutions: Essential Materials for Implementation
Table 2: Key Research Reagents and Equipment for Integrated Mass Photometry/Cryo-EM Workflows
| Reagent/Equipment | Function | Application Notes |
|---|---|---|
| Refeyn TwoMP Mass Photometer [75] | Measures molecular mass distributions of single particles in solution | Benchtop instrument with 30 kDa - 5 MDa mass range; includes anti-vibration device |
| MassGlass Sample Carriers [75] | Measurement surface for mass photometry | Specialized glass slides optimized for minimal background scattering |
| Native Protein Standards [73] | Calibration of mass measurements | Use proteins covering expected mass range (e.g., thyroglobulin, beta-amylase) |
| Membrane Mimetics (e.g., LMNG, GDN, nanodiscs) [76] | Stabilize membrane proteins for analysis | Compatible with mass photometry; crucial for membrane protein cryo-EM |
| Size-Exclusion Chromatography System | Sample purification prior to screening | Used in conjunction with mass photometry for comprehensive quality control [16] |
| Automated Grid Preparation System | Cryo-EM sample vitrification | Follows successful mass photometry quality check |
The integration of mass photometry into cryo-EM workflows represents a significant advancement in structural biology methodology. By providing rapid, quantitative assessment of sample quality under native conditions with minimal sample consumption, mass photometry serves as a critical gatekeeper before committing valuable resources to cryo-EM grid preparation and data collection [66] [75]. This case study demonstrates that systematic implementation of mass photometry as a pre-screening tool can dramatically reduce wasted effort and improve the success rate of high-resolution structure determination.
The broader implications for research reproducibility are substantial. As noted in community guidelines for protein quality control, simple biophysical characterization of protein reagents should be considered essential for identifying poor quality or artefactual research early in the experimental process [16]. The integration of mass photometry addresses this need directly, providing researchers with a accessible, user-friendly method to validate sample integrity before proceeding to more resource-intensive structural studies. As cryo-EM continues to push the boundaries of structural biology, mass photometry is poised to become a foundational technology for ensuring that these advances are built upon a foundation of high-quality, well-characterized samples [77] [74].
Conclusion
Optimizing protein homogeneity and dispersity is not a single step but an integrated process that spans from construct design to final validation. The convergence of physical processing methods like HPH, enzymatic refinement, and robust hetero-protein complex formation provides a powerful toolkit to tackle aggregation. However, these methods' success must be quantified by a fit-for-purpose validation strategy that leverages both traditional and cutting-edge analytical techniques. The adoption of community-wide QC guidelines is paramount to overcoming the reproducibility crisis, estimated to cost billions annually. Future progress will be driven by the increased integration of AI for predicting purification strategies and the development of automated, high-throughput QC systems. By prioritizing sample quality, the scientific community can ensure that foundational protein research translates reliably into successful therapeutic and clinical applications.
References
- 1. Quality control of protein reagents for the improvement ... [https://pmc.ncbi.nlm.nih.gov/articles/PMC8121922/]
- 2. Purification of zinc transporter ZntB [https://www.sciencedirect.com/science/article/abs/pii/S1046592810000458]
- 3. Dispersity – Knowledge and References [https://taylorandfrancis.com/knowledge/Medicine_and_healthcare/Medical_technology_%26_engineering/Dispersity/]
- 4. Stabilising proteins in solution using affordable and readily ... [https://link.springer.com/article/10.1007/s12551-025-01341-7]
- 5. 5 Steps to Protein Isolation and Purification [https://www.thermofisher.com/us/en/home/life-science/protein-biology/protein-purification-isolation/5-steps-protein-purification.html]
- 6. An automated high-throughput approach for determining ... [https://www.sciencedirect.com/science/article/pii/S0023643825006607]
- 7. Protein Purification Support—Troubleshooting [https://www.thermofisher.com/us/en/home/technical-resources/technical-reference-library/protein-purification-isolation-support-center/protein-purification-support/protein-purification-support-troubleshooting.html]
- 8. Protein Purificaiton Troubleshooting & Best Practices [https://www.bostonind.com/blog/protein-purificaiton-troubleshooting-and-best-practices?srsltid=AfmBOoqrt5LXRmv5uDxc9Gl5Lh0G5gr1uu7mDtt4Cy0vH_Vu306YRPz7]
- 9. The Benefits of Using Enzymes in Protein Isolates 2025 [https://www.amano-enzyme.com/news/the-benefits-of-using-enzymes-in-protein-isolates-2025/]
- 10. Plant-derived insoluble protein aggregates [https://pmc.ncbi.nlm.nih.gov/articles/PMC12483645/]
- 11. A review on sustainable non-thermal approaches for pea ... [https://pmc.ncbi.nlm.nih.gov/articles/PMC12212169/]
- 12. Western Blot Troubleshooting [https://www.thermofisher.com/us/en/home/life-science/protein-biology/protein-biology-learning-center/protein-gel-electrophoresis-information/western-blot-troubleshooting.html]
- 13. Western Blot: The Complete Guide [https://www.antibodies.com/applications/western-blotting]
- 14. 6 Best Tips for Troubleshooting Poor Band Separation on ... [https://azurebiosystems.com/blog/6-tips-for-troubleshooting-poor-band-separation-on-sds-page-gels/]
- 15. Protein quality control for downstream processes [https://www.embl.org/about/info/course-and-conference-office/events/pqc26-01/]
- 16. Quality control of protein reagents for the improvement ... [https://www.nature.com/articles/s41467-021-23167-z]
- 17. Optimization of protein purification and characterization ... [https://www.sciencedirect.com/science/article/abs/pii/S1046592813001459]
- 18. Quality assessment and optimization of purified protein samples [https://pmc.ncbi.nlm.nih.gov/articles/PMC4299812/]
- 19. Western blot protocol [https://www.abcam.com/en-us/technical-resources/protocols/western-blot]
- 20. Troubleshooting: Purification of a Tagged Protein [https://www.goldbio.com/blogs/articles/troubleshooting-purification-of-a-tagged-protein?srsltid=AfmBOopj_3WdYTuZCRJ5Hm_YxRWe883bXXjcQQoA2KVEsKBZw-ScVW9R]
- 21. High pressure homogenization to boost the technological ... [https://pmc.ncbi.nlm.nih.gov/articles/PMC10111953/]
- 22. Break-Up of Plant Cell Structures in High Pressure ... [https://link.springer.com/article/10.1007/s12393-025-09397-7]
- 23. Mechanism for Improving Acid-Induced Hazelnut Protein ... [https://www.mdpi.com/2304-8158/14/18/3273]
- 24. Common Troubleshooting of High Pressure Homogenizer [https://www.caspeter.com/news/common-troubleshooting-of-high-pressure-homogenizer/]
- 25. Common faults and maintenance methods of high pressure ... [https://en1.nbchao.com/k/7610/]
- 26. Your High Pressure Homogenizer Won't Build ... - Triplex Blog [https://triplexblog.com/2022/05/20/your-high-pressure-homogenizer-wont-build-pressure-heres-what-to-check/]
- 27. Enzymatic Hydrolysis With Pepsin Enhanced the Nutrient ... [https://pmc.ncbi.nlm.nih.gov/articles/PMC12618858/]
- 28. Enzymatic Hydrolysis Optimization of Yak Whey Protein ... [https://pmc.ncbi.nlm.nih.gov/articles/PMC10975945/]
- 29. Optimization of Enzymatic Protein Hydrolysate from Mung ... [https://www.mdpi.com/2304-8158/14/14/2459]
- 30. Hydrolysis of Proteins: Breaking Down to Amino Acids [https://aapep.bocsci.com/resources/hydrolysis-of-proteins-breaking-down-to-amino-acids.html]
- 31. Using Large Language Model to Optimize Protein Purification [https://pmc.ncbi.nlm.nih.gov/articles/PMC12005808/]
- 32. Protein Purification Protocol & Troubleshooting Guide [https://www.creativebiolabs.net/protein-purification.htm]
- 33. Troubleshooting: Purification of a Tagged Protein [https://www.goldbio.com/blogs/articles/troubleshooting-purification-of-a-tagged-protein?srsltid=AfmBOoqPeN1rjhSyLxi1xVnxx6-xbWfjixca9kBuS9qBCJ2lclEb7_Jd]
- 34. Protein Purificaiton Troubleshooting & Best Practices [https://www.bostonind.com/blog/protein-purificaiton-troubleshooting-and-best-practices?srsltid=AfmBOoo6p3nd4KjWtk1LQhiAMg8IgaMSASdIh7xve0O2XQ8ov289_EUr]
- 35. Troubleshooting Guide to Expressing Intrinsically ... [https://pmc.ncbi.nlm.nih.gov/articles/PMC6345686/]
- 36. Practical Considerations for IEX Separation [https://www.sigmaaldrich.com/US/en/technical-documents/technical-article/protein-biology/protein-purification/iex-separation?srsltid=AfmBOor93uCDvq4fj8KCa2BRwj4kPAGstOn2XaxvCgBInlSGpk8IY-xK]
- 37. Ion Exchange Chromatography Troubleshooting [https://www.sigmaaldrich.com/US/en/technical-documents/technical-article/protein-biology/protein-purification/ion-exchange-chromatography-troubleshooting?srsltid=AfmBOopIoXWssd4bbyXPfeMQ8mXAclQscOUX160wMasrRj_K_xqpKVMb]
- 38. Buffer Preparation — Hints, Tips and Common Errors [https://www.chromatographyonline.com/view/buffer-preparation-hints-tips-and-common-errors-0]
- 39. High-throughput stability screening for detergent ... [https://www.nature.com/articles/s41598-019-46686-8]
- 40. Membrane Proteins: Structure, Function and Motion [https://www.mdpi.com/1422-0067/24/1/468]
- 41. Hurdles and advancements in experimental membrane ... [https://pubmed.ncbi.nlm.nih.gov/41027549/]
- 42. Mechanism of Insoluble Aggregate Formation in a ... [https://pmc.ncbi.nlm.nih.gov/articles/PMC10661820/]
- 43. Intrinsically disordered proteins [https://en.wikipedia.org/wiki/Intrinsically_disordered_proteins]
- 44. Intrinsically Disordered Proteins: An Overview - PMC [https://pmc.ncbi.nlm.nih.gov/articles/PMC9693201/]
- 45. Optimizing HPLC Pressure: Real Solutions for Better ... [https://www.sepscience.com/optimizing-hplc-pressure-real-solutions-for-better-performance-10610]
- 46. Troubleshooting Common HPLC Issues [https://www.labcompare.com/10-Featured-Articles/617988-Troubleshooting-Common-HPLC-Issues/]
- 47. HPLC Troubleshooting Guide [https://scioninstruments.com/us/blog/hplc-troubleshooting-guide-2/]
- 48. Protocol | HUBU-China - iGEM 2025 [https://2025.igem.wiki/hubu-china/protocol]
- 49. Selected new approaches and future perspectives in liquid ... [https://www.sciencedirect.com/science/article/pii/S0928098725001009]
- 50. Optimization and Validation of an HPLC Method ... [https://pmc.ncbi.nlm.nih.gov/articles/PMC12409534/]
- 51. Fusion Tags [https://www.abcam.com/en-us/technical-resources/guides/fusion-tags-guide/fusion-tags]
- 52. Beyond Purification: Evolving Roles of Fusion Tags in ... [https://pmc.ncbi.nlm.nih.gov/articles/PMC12468823/]
- 53. Avoid Common Obstacles in Protein Expression [https://www.neb.com/en-us/tools-and-resources/feature-articles/bypassing-common-obstacles-in-protein-expression?srsltid=AfmBOoojqBdCs-bRwFpYNbI3wtQMf7pUiOAHl4GdCzqcueq7TgUqpxuL]
- 54. Synthetic intrinsically disordered protein fusion tags that ... [https://www.nature.com/articles/s41467-024-47519-7]
- 55. When your his-tagged constructs don't bind— ... [https://www.takarabio.com/about/bioview-blog/tips-and-troubleshooting/when-your-his-tagged-constructs-dont-bind?srsltid=AfmBOoqm4Ya8pZc-LZbnyo7kMwcMNTMqDsccX9HK4Q5dMzhZGbgyl-4E]
- 56. Gy's sampling theory [https://en.wikipedia.org/wiki/Gy%27s_sampling_theory]
- 57. Opinion Piece: Tools for Particle-Size-Based Homogeneity ... [https://pmc.ncbi.nlm.nih.gov/articles/PMC12523435/]
- 58. Extensions to the Theory of Sampling 1. The extended Gy's ... [https://www.sciencedirect.com/science/article/pii/S0003267021009533]
- 59. Characterization of Particle-Size-Based Homogeneity and ... [https://www.mdpi.com/2072-6651/15/7/450]
- 60. SEC-MALS for Absolute Molar Mass and Size Measurements [https://www.wyatt.com/solutions/techniques/sec-mals-molar-mass-size-multi-angle-light-scattering.html]
- 61. Troubleshooting Sodium Dodecyl Sulfate- Polyacrylamide ... [https://www.hycultbiotech.com/sds-page/troubleshooting/]
- 62. Troubleshooting SDS-PAGE Gel Running Issues [https://www.goldbio.com/blogs/articles/troubleshooting-sds-page-gel-running-issues?srsltid=AfmBOopDQ1xFwx7b3_UanK4k07YAKBzXiREs7PE9bI7-Kqvr71wuyDLG]
- 63. Challenges in the Determination of Protein Aggregates ... [https://www.chromatographyonline.com/view/challenges-determination-protein-aggregates-part-1]
- 64. Standard Protocol for Mass Photometry Experiments - PMC [https://pmc.ncbi.nlm.nih.gov/articles/PMC8344692/]
- 65. Lifting the Concentration Limit of Mass Photometry by PEG ... [https://pmc.ncbi.nlm.nih.gov/articles/PMC11342371/]
- 66. Enhancing cryo-EM workflows with mass photometry [https://refeyn.com/post/enhancing-cryo-em-workflows-with-mass-photometry-a-smarter-pre-screening-approach/]
- 67. Mass Photometry 102: common questions, troubleshooting ... [https://refeyn.com/mass-photometry-102-common-questions-troubleshooting-and-best-practices]
- 68. 优化猪脑组织的微管蛋白产量 [https://www.jove.com/cn/t/64925/optimizing-tubulin-yield-from-porcine-brain-tissue]
- 69. Comparison of Protein Purification Methods: Stepwise ... [https://superchemistryclasses.com/comparison-of-protein-purification-methods/]
- 70. Dialysis or Desalting? Choosing a Protein Purification ... [https://www.thermofisher.com/blog/life-in-the-lab/dialysis-or-desalting-choosing-a-protein-purification-method/]
- 71. Protein Expression and Purification Core Facility [https://www.embl.org/groups/protein-expression-purification/services/protein-purification/]
- 72. Protein Purification and Isolation Market Size 2025 to 2034 [https://www.precedenceresearch.com/protein-purification-and-isolation-market]
- 73. How does mass photometry work? (2025) [https://refeyn.com/post/how-does-mass-photometry-work]
- 74. Mass photometry as a sample analysis tool for structural ... [https://www.sciencedirect.com/science/article/abs/pii/S0969212625001480]
- 75. How mass photometry saves time (and money) in cryo-EM ... [https://refeyn.com/post/mass-photometry-vs-cryo-em-experiments]
- 76. Coming Clean and Avoiding Bubble Trouble–Using ... [https://www.mdpi.com/2218-273X/15/9/1315]
- 77. Faster, Easier, Clearer [https://www.linkedin.com/pulse/faster-easier-clearer-refeyn-h42tf]